 The Poor Man’s Vacuum Sealer: A Prepper’s Guide to Water Displacement Sealing
Ever watched those fancy vacuum sealer infomercials and thought, “That’s great, but what happens when the power’s out or the machine breaks?” Well, I’m about to share a method that professional chefs have been using for years, and it doesn’t require a single electrical outlet or expensive machine. Welcome to the world of water displacement sealing, or as fancy chefs call it, the “poor man’s sous vide.”
First, let’s talk about why this method works. It all comes down to basic physics – something even a teenager’s eyes don’t roll at (much). Water pressure pushes against everything equally, which means when you submerge a zip-top bag, the water naturally forces air out of it. It’s like having thousands of tiny hands gently squeezing your bag from all directions. And the best part? It works just as well as those expensive vacuum sealers for most applications.
Now, before we dive in (pun absolutely intended), let’s address what you’ll need. The good news is you probably already have everything: zip-top freezer bags (and no, the dollar store bags won’t cut it – you need the good stuff), a large pot or clean sink of water, and whatever you’re planning to store. That’s it. No batteries, no electricity, no $200 machine that takes up half your counter space.
Here’s where the magic happens. Start by placing your items in the freezer bag, but don’t seal it yet. If you’re storing documents, place them in a second bag first – think of it as a belt-and-suspenders approach to protecting important papers. For food items, arrange them in a single layer – think of laying out dominos rather than stacking them. This helps achieve a better seal and more efficient storage.

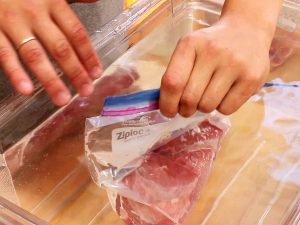
Water displacement vacuum sealing
Now comes the technique that separates the pros from the amateurs. Seal the zip-top almost completely, leaving just a small corner open – about the width of your pinky finger. This is your air escape route. Slowly lower the bag into the water, starting at the sealed end, keeping the open corner above the waterline. As you submerge the bag, you’ll see air bubbles escaping through that open corner. It’s like watching your grocery budget when your teenagers discover Uber Eats – the air just disappears.
Here’s the crucial part that most people miss: as you’re submerging the bag, let the water pressure do the work. Don’t force it, don’t rush it. When the water level reaches just below the open corner and all visible air is out, seal that final corner while the bag is still mostly submerged. Congratulations! You’ve just vacuum-sealed without a vacuum sealer.
But what about long-term storage? This is where proper technique really matters. After sealing, dry the outside of the bag thoroughly and check your seal by gently pressing on the contents. If air bubbles appear or the seal separates, you’ll need to try again. A good seal should feel tight, like a well-wrapped Christmas present before the kids get to it.
This method works amazingly well for:
- Emergency documents (double-bag these)
- Matches and fire starters
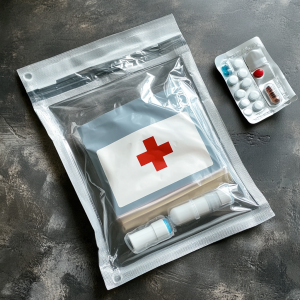
- First aid supplies
- Clothing and shelter items
- Dry foods (rice, beans, etc.)
- Emergency toilet paper (yes, we all learned that lesson in 2020)
Some pro tips I’ve learned through trial and error (mostly error): When storing papers or documents, add a desiccant packet if you have one. It’s like adding insurance to your insurance. For clothing, rolling items tightly before bagging helps eliminate air pockets. And for anything with sharp edges or corners, wrap them first to prevent bag punctures – a punctured bag is about as useful as a screen door on a submarine.
Here’s something most people don’t think about: this method is actually superior to machine vacuum sealing in some ways. It gives you more control over the process, allows you to adjust the level of air removal (some items shouldn’t be completely compressed), and you can easily check your work as you go. Plus, there’s no risk of crushing delicate items like crackers or cereal – unless that’s what you’re going for.
A word about bags: while any zip-top freezer bag will work, I’ve found that name-brand freezer bags (you know the ones) tend to hold their seals better long-term. The few extra cents per bag is worth it when you’re talking about protecting important items. Think of it like buying insurance – the cheap stuff is fine until you actually need it.
Common mistakes to avoid? Don’t try this with regular sandwich bags – that’s like trying to stop a flood with paper towels. Don’t overfill your bags – leave about an inch of space above your items for a proper seal. And perhaps most importantly, don’t skip testing your seals. A failed seal discovered during an emergency is like finding out your umbrella has holes after you’re already soaked.
For those concerned about long-term storage, rotate your sealed items every 6-12 months, checking seals and replacing bags as needed. Remember, plastic is not oxygen proof. Even the best seals can fail over time – it’s just physics being physics. Consider this maintenance part of your regular prep rotation, like checking your flashlight batteries or updating your emergency contacts.
Remember: Practice this technique now, while you have the luxury of do-overs. Your first attempt might look like a preschooler’s art project, but by your third or fourth try, you’ll be sealing like a pro. And in an emergency, knowing how to protect your crucial items from water and air without relying on expensive equipment could make a real difference.


1 Comment
ddaniel727 · November 20, 2024 at 12:50 pm
I have used this method for years. It works rather well.
Comments are closed.