There’s not much that I dislike more than spending money on produce only to have it go bad before I get a chance to use it. I don’t just view it as food going to waste, but also the money and the time it took to obtain it. So today I’d just like to share a couple of tips to help you extend the life of your food. I like crisp celery but nowadays it seems that every time I purchase it, it becomes limp and lifeless before I get to use it. I discovered that you can resurrect wilted celery though, as well as many other similar vegetables. The first rule is to make sure you get your produce out of the plastic bags that you typically put them in at the store. Then be sure to use a quality rinsing agent (I prefer all natural solutions such as medicinal quality lemon essential oil mixed with water and allow the veggies to soak for a couple of minutes in that solution. Just the observation of these two steps is enough for you to see a marked difference in the life of your produce!
However, in spite of my best efforts I frequently run into wilted celery, lifeless lettuce, etc. Fortunately, there’s a solution for that scenario as well.
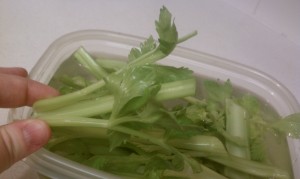
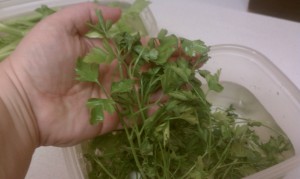
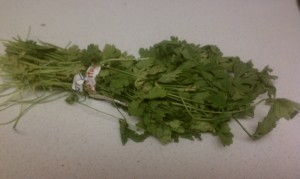 First remove any brown or yellow parts of the produce, that are clearly lifeless. There’s no chance for those parts. Then cut it up in large chunks and soak it in a bowl of cold water for a couple of hours. You’ll be happy to see happy produce again. As you can tell in the pictures there’s a marked difference! This tip can be used for herbs, cabbage, peppers, and lettuce. It’s important that you don’t forget and leave the produce in the water any longer than a couple of hours. (Remember, water is the universal solvent.) Once you’ve revitalized your produce, be certain to remove it from the water and toss it in a salad spinner in order to get it dry again. Also, if you’ve got a vegetable soup or stew recipe planned in the next 24-36 hours, you can actually use the water you used to refresh the produce as well as that which ends up in the bottom of your salad spinner in your upcoming recipe in place of the water that a recipe calls for. It’s got great flavor and nutrients in it.
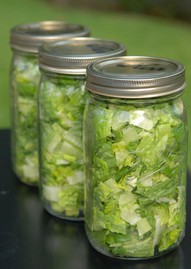 Once I’ve dried out the produce, I then put it in a wide mouth Mason jar and then seal it with the FoodSaver. Then I put the jar in the refrigerator. This enables it to last significantly longer without losing it’s moisture and without oxidizing and turning brown. I don’t know about you but I hate it when I splurge on fresh herbs and have them go bad before I get to use them all. This is a GREAT way to stretch your dollars and give yourself access to the produce you purchase longer. Obviously, having refrigeration isn’t a “crisis scenario” reality, but the more money I save today the more money I have to spend on getting some gidgets and gadgets for a crisis scenario. *grin* For more details on how to use the FoodSaver check out our YouTube video.
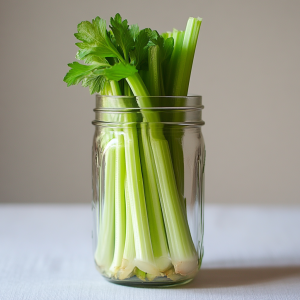
Make your vegetables last longer


52 Comments
Jamie · March 13, 2013 at 6:24 am
Kellene again Brilliant I did not think of reusing the water for cooking. I’m thinking this would be a great water when warmed for making some “Artisan bread” or making up a bit of homemade pasta with just a hint of herbs. Yum I can think of all kinds of ideas for adding flavor.
Michele · March 13, 2013 at 6:28 am
How do you seal jars with a Foodsaver? I thought a Foodsaver was just for shrink wrapping foods. Very curious about this product and this idea.
Kellene Bishop · March 13, 2013 at 8:00 pm
We have youtube videos showing this and several articles on here explaining it. If you’ll just put in “FoodSaver” in the search bar then you’ll find what you need as you’ll see it in the title.
Michele · March 13, 2013 at 6:44 am
I found my answers! On YOUR blog. Duh, I just did a search and voila…..
http://preparednesspro.com/foodsaver-tips-and-tricks/
Thank You !
Jennifer · March 13, 2013 at 8:48 am
Just a quick question…do you think that a handheld foodsaver could be used for sealing mason jars?
Kellene Bishop · March 13, 2013 at 8:00 pm
Nope, the manufacturer makes it perfectly clear that that version is not appropriate for jars. It loses its seal.
chris · March 13, 2013 at 9:39 am
After you soak the veg and put them in the jars do you put them in the frig?
Kellene Bishop · March 13, 2013 at 8:00 pm
yes.
Mamarama · March 13, 2013 at 9:55 am
How about a video Kellene showing how to do this?
Az-Vicki · March 13, 2013 at 1:28 pm
Thanks for this timely tip Kellene. I too have some wilted celery and cilantro in my crisper and a wide mouth jar sealer on it’s way…woo hoo no more wilted veggies!!!
Kellene Bishop · March 13, 2013 at 8:00 pm
Already done.
Liz · March 13, 2013 at 12:14 pm
Kellene, how long will the celery last in the jars? Approximately.
Kellene Bishop · March 13, 2013 at 8:01 pm
It depends on how often you get into the jars and whether or not you reseal with the FoodSaver each time you do. But several weeks is an easy guesstimate.
Penny · March 13, 2013 at 1:48 pm
Yes Kellene, please show how you take the air out of a mason jar. I have a food saver with the abilities but I do not know how to do this. Please show us!
And how long with the lettuce last after doing this in the jar.
Kellene Bishop · March 13, 2013 at 8:02 pm
It’s on our YouTube channel and explained in articles as well. http://www.youtube.com/preparednesspro I finally linked to it at the bottom of the article though for easier access.
Kellene Bishop · March 13, 2013 at 8:28 pm
Penny, I’ve linked to the video on YouTube now in the article.
Tina · March 13, 2013 at 1:56 pm
What do you know about the Food Saver and botulism? I have been gung-ho using mine like crazy, and then I read about the “possibility” of botulism growing due to the low acid content. Moisture was another factor that increased that possibility, so I started worrying about doing it for lettuces and such. Also wondering about the raisins I sealed…
Kellene Bishop · March 13, 2013 at 8:03 pm
You’ll notice that I state to clean everything well. Botulism comes from the soil. So as long as you have the produce properly cleaned then it won’t be an issue.
Anita · June 26, 2013 at 1:00 am
If we rinse stuff in an apple cider vinegar water rinse, will that take care of bacteria ok (like for lettuce, greens, etc.)?
Anita · June 26, 2013 at 1:01 am
I wonder if growing things in water and no soil (like aquaponics/hydroponics) if that keeps produce free of soil-borne botulism bacteria?
nancy · March 13, 2013 at 2:02 pm
Thanks SO much for this idea! I, too, hate to throw out good food. But sometimes the cost of the FoodSaver bags just seemed prohibitive for things that I’ll use in a day or two. Jars are the perfect answer and I already have the sealer for both regular and wide mouth jars! Woohoo!!!
Barbara · March 13, 2013 at 2:39 pm
When all else fails . . . don’t just throw it away . . . compost it. Then it’s not a total loss. Thanks for the tips!
Penny · March 13, 2013 at 3:26 pm
Once it is in your jars does it need to be kept in the frig? Lots of questions!
Kellene Bishop · March 13, 2013 at 8:03 pm
Yes. I made the more clear in the article. Thanks.
Nicole · March 13, 2013 at 3:32 pm
Dumb question, but I just want to be sure, you keep the jars in the fridge after sealing, right?
For those of you looking to seal jars with a foodsaver, I’ve been doing this but I was nervous at first. As long as you have the jar attachment and it fits over the jar lid, you’re good to go. Put your contents in the jar (I love Kirkland Coffee from Costco so this is how I keep it fresh, but put a coffee filter on the top if you’re sealing fine, dry ingredients), put the lid on the jar without the screw band, put the jar attachment over the lid and down as far as it will go. Attach the tube to the port on the top of your foodsaver, lock it in operate position, choose your settings, and press “canister”. I followed Kellene’s and the manufacturer’s directions to figure this out. Once its finished pull off the attachment, check the seal, and put on the screw band. All done! I haven’t had a problem with my jars yet, though I’ve just done coffee and almonds.
Hope that helps!
Kellene Bishop · March 13, 2013 at 8:05 pm
Yes, in the fridge.
If I could find someone to help me full-time I wouldn’t miss things like cross-referencing other articles that have already been written in the body of another. I’m definitely overloaded right now. Sorry.
Nicole · March 13, 2013 at 3:34 pm
One more question, does anyone know how full the jar needs to be? So far I haven’t sealed a jar that isn’t nearly full. Can we take out some of the contents and reseal?
Kellene Bishop · March 13, 2013 at 8:04 pm
I’ve NEVER had the experience nor have I heard of it yet. That’s a weird one and just doesn’t make any sense in my brain mathematically either. I know I have several jars that are only partially full when I seal them. Sounds like you have a defective jar attachment.
Betty Belcher · March 13, 2013 at 4:51 pm
I just grow my greens, and herbs on the window sills. Anything that is going bad goes to the chickens:-)
L. Moudry · March 13, 2013 at 5:11 pm
I have been using the sealed jars for my produce and LOVE my Food Saver! I quartered a head of lettuce and put it in a big 1/2 gal jar and, 12 days later, there still is not one speck of rust, brown, slime, etc! Crisp and fresh as can be. I also have celery, cabbage, and shredded lettuce in pint jars and they too a fresh, crisp and gorgeous! Also nice because you can use the lids over and over if you’re careful not to bend or mar them when opening the jar.
PaleoBabe · March 13, 2013 at 5:57 pm
I’ve used “green bags” with great success. The trick with storing any veggies and most fruit, is clean and dry them, – getting them out of store bags ASAP.
Kellene Bishop · March 13, 2013 at 8:13 pm
Remember, plastic still allows for oxygen to exchange. That’s why I use glass jars.
lilly merx · March 13, 2013 at 6:21 pm
Thank you for the great ideas…
karen · March 14, 2013 at 2:14 am
You can also wrap celery in aluminum foil & put it in the fridge. Wrap lettuce herbs etc. in paper towels to help with spoilage.
Kellene Bishop · March 14, 2013 at 3:10 am
One should NEVER permit aluminum to come in contact with their food, particularly foil. You don’t need that kind of poisoning in your food. Do a little search on YouTube for some great explanations of this.
Jakie · March 14, 2013 at 5:08 pm
Love my FoodSaver for doing this stuff.
keryl peterson · March 15, 2013 at 12:59 am
I use green boxes that I got from either QVC or HSN. Cut up lettuce goes faster, but we have used while head 3 months after purchase. Still crisp and like new. I love the containers. They are like tupperware and are green. I think by Debbie Meyer. But not cost efficient outside of the shopping network. Kellene, do you have a book on storing food? I saw you on the pepper show and am very interested in purchasing a book from you.
Kellene Bishop · March 15, 2013 at 3:30 am
Keep in mind that plastic doesn’t prevent the oxygen from exchanging.
Nope, no book on that yet, but there are over 800 articles that you can look up by the Food Preparedness principle simply by clicking on the wheat shaft that’s rotating in the 10 Principles of Preparedness carousel up on the right hand side of this page.
I am coming out with a cookbook VERY soon though. 🙂
BellasMom · March 17, 2013 at 4:16 pm
Kellene… I learned so much from your site!
If you dont have the lemon essential oil can you use regular lemon juice to rinse the veggie? If so what ratio would you reccomend?
MHSagteach · March 23, 2013 at 6:38 pm
Hi Kellene! What great ideas for extending produce life. Did you know that you can even reuse that “butt” end of celery to grow more in your home garden, or on a window sill? just put it in water and let it sit near a sunny spot. Once the leaves and roots grow you can plant it. Then, these can become more food later for your family. You can even dehydrate the leaves to flavor soups and stock.
Anita · June 26, 2013 at 1:11 am
I’ve regrown many celery stalks – one thing I’ve found is, I get better growth if I cut the whole bottom of the stalk off several inches from the bottom. The taller, the better. They will be growing almost immediately. I use a large casserole dish and load it with cut off stalks (buy celery by the box). Just enough water for the roots to get to so you cut down on rot starting. The last batch I did had somewhere around 15 stalks in the dish and they all grew. I tried transplanting them into a plastic storage box with compost in it and, at first, it looked like they were going to take off ok, but eventually they all died. This was in the middle of winter and I could not plant them outdoors so I tried this way in the house. Won’t do that again. But it still gave me another cutting of celery before I lost the plants.
Sharon · March 27, 2013 at 12:11 am
I hope u read Kellene…..I put my vegs. in the jars…they are wonderful!! Two questions….why would they need to be refrigerated and how long will they stay. I have them in frig. and have been there 3 weeks….haven’t changed. Just curious.
Thanks for all you do!!!
Kellene Bishop · March 27, 2013 at 5:07 am
They need to be refrigerated to slow down the degradation process. You’re not preserving these. You’re simply getting then to last longer before they go bad. I’ve had some folks tell me 4 or even 5 weeks. I use mine up too fast to go beyond 3 weeks though.
Sharon · March 28, 2013 at 6:45 pm
Thanks Kellene…as busy as you are I’m thankful for your reply!
Jen · April 7, 2013 at 7:24 am
Hi Kellene,
So fascinating–again! I have clarifying questions, as I have had mixed success with getting my lids to keep their seal using the FoodSaver:
When you seal using the FoodSaver, do you first soak the lids in hot/just-before-a-boil water to soften the compound?
Do you consider the age of the lid? (I read in my All-American Pressure Canner book that lids over 5 years old are not guaranteed to work due to the compound hardening)?
Last, you mention that plastic does not keep out oxygen, but the Tattler lids are made of plastic. Does that mean they will not protect my foods long term?
Your kind attention to these questions is SO appreciated! I am trying to determine if my lids are the problem or if I need to buy a new FoodSaver. 🙂
Kellene Bishop · April 8, 2013 at 10:33 pm
Tattler lids are an extremely dense substance. Do they contain plastic? Yup, but you’re confusing the plastic used in the flimsy bags and buckets with the plastic components used in the Tattler Lids.
No, I don’t soak the FoodSaver lids in hot water, but it wouldn’t hurt and probably even a good idea. However, you can most certainly use USED lids for your FoodSaver sealing. Even IF the seal breaks in a FoodSaver jar project, you’ll still get much better results than you would leaving the contents in their original packaging.
All-American is correct that some plastics become brittle over time; however that’s typically mitigated when you soften the lids through the sanitation process or canning process.
Perhaps if you share with me the type of problems that you’re having with the seals I can better help you trouble shoot.
Anita · June 26, 2013 at 1:14 am
I’ve been wondering about warming the lids before sealing but if you use water, it’s getting them wet. So, would sticking them in the dehydrator on a low setting warm them enough, yet keep them dry? What do you think?
Rhonda · April 12, 2013 at 12:12 pm
You are so right about saving lettuce in jars. I have a 9-year-old who would rather eat lettuce than anything else as an after school snack. I but mixed lettuce and iceberg, wash it, chop it up and place it in several pint jars in the fridge. It’s soooooo much easier that way and the lettuce lasts a lonnnnnng time! 🙂 It also works for carrot sticks and grapes as well.
Sarah · April 17, 2013 at 7:15 am
Kellene, I keep my celery in a glass with water on the counter like flowers. Lasts for weeks if I change the water and cut the bottoms occasionally, again just like flowers. It may not last as long as your method, and is a little more work, but in our house it’s a lot more likely to get eaten that way.
Liz · June 25, 2013 at 5:30 pm
Could you just put a small oxygen absorber in it?
Kellene Bishop · June 25, 2013 at 8:35 pm
If you wanted to, I suppose.
Kellene Bishop · June 26, 2013 at 3:53 am
Getting lids wet to sanitize them has been the standard appropriate practice for decades. Water dissipates in that area during the canning process.
Comments are closed.