How to can bacon
Bacon, bacon, B-A-C-O-N! There are some foodies who consider bacon to be the Food of the God’s. While Paula Deen has her well-known belief of “you can never have enough butter” (and I do SO agree), there are many bacon fans out there that would rather have to listen to a Milli Vanilli Greatest Hits Marathon than do without their bacon. I think we’d encourage a lot more people to carry firearms if we were ever able to convince bacon lovers that zombies might take their precious salted pork someday. “Zombies after my bacon?! Now them’s fightin’ words!”
 NOTHING else tastes like bacon any better than BACON.

It just can’t be replicated with a pill, hypnosis, and definitely not TVP! I suspect that this is why groceries chains are claiming that the amount of bacon sales has not reduced in spite of a 15.6 percent increase from December of last year to the end of January 2012. $4.65 a pound! (2024 is 6.82 per pound!) Ouch! And with the prices of fuel, corn, as well as so many other things that influence the price of this scrumptious pork product, we’re not likely to see it go under $6.00 a pound again any time soon. (see: Bureau of Labor Statistics – Average Retail Foods Prices). I suppose that makes sense when you consider that bacon slides its way into every meal of the day, and if you’ve ever tried the chocolate covered bacon, it will definitely sizzle its way into your snack time of day. But after seeing 9 oz can of canned bacon sell for $19.99 one day 9 ounces, I knew that I had to find an alternative to feed the salty hunger cravings AND I had to stick with my criteria of getting it at an affordable price and stocking up without having to worry about freezer space.
 I always say that if the store can do it, then so can I. And after having such great success in canning nearly every other meat imaginable, I certainly didn’t want to miss out on a successful home canning method. So I studied and played and experimented—a lot—because I found a lot of reports of failed attempts as well as some less than fabulous attempts. I also saw a lot of people doing it the hard way—or worse, the expensive way.
 There are a lot of various complaints regarding home-canned bacon. And, if you know foodies, you know that anything other than “Wow! That tastes great!” just won’t do! Issues such as the canned bacon crumbling when cooked, tasting odd, time consuming, hard to get out of the jar afterwards, waste of good meat fat, etc., etc. were just a few of the concerns I wanted to address. So here you go; here’s my best pork leg forward.
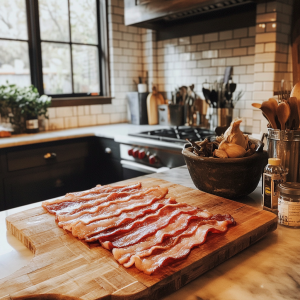
Satisfy your family’s craving for bacon by making your own Home-canned bacon! It’s the best!
 First of all, how you can your bacon is determined by what you want it ultimately to look like when you serve it. If you just want bacon in order to flavor beans, quiches, scrambled eggs, or something in which you don’t need full-crispy strips, then all you have to do is can bacon the way you do any other meat. Stuff it in the jar raw up to the shoulder, wipe off the rim, place a clean flat lid on top, then the jar ring on top, fingertip tight, and then process it for 75 minutes at 10 pounds of pressure for pint jars (which are my preferred sizes for such recipes) and 90 minutes for quart jars at the same pressure—though high elevation may require 15 pounds of pressure. When in doubt, read your manufacturer’s directions. This method will cook your bacon thoroughly and will enable it to easily last on your cool, dark shelves for 10 years. Yes, I said 10 years. That grin on your face is perfectly permissible. When you’re ready to dig in to this bacon, just pour all of the contents into your beans, or dump the contents into a frying pan and sizzle them up on a medium-high heat. Drain the fat and save it in a covered glass jar for future cooking oil needs. (That’s the good kind of fat for the body—much better than any hydrogenated fats.) I make bacon gravy and serve it over rice or mashed potatoes.
Here’s a quick bacon hint
 You can save a lot of money on buying bacon that you don’t need to end up in a particular shape. A lot of meat counters in grocery stores will set aside the bacon bits, ends, and pieces. Sometimes as they are cutting it, the strips are too thick, too thin, too small, or just plain falling apart or in pieces once the good stuff’s cut. But for you, this is perfectly wonderful bacon to have on hand for anything that doesn’t require crispy strips. Making some phone calls to ANY of your stores or meat manufacturers would be a great way to get your hands on some yummy bacon for much less than the strips.
Now if it’s crispy bacon strips along side your waffles or on a tasty bacon, sprouts, and tomato sandwich that you want, well, that’s when you pull out the wide-mouth quart jars stuffed with canned bacon. Obviously the goal is to have bacon be shelf-stable for 10 years AND be able to cook up as sizzling strips. So here’s what you will need:
- 1 wide-mouthed quart size mason jar for approximately every pound of bacon you want to can with appropriate lids.
 All the bacon you care to can, (preferably thick cut, but if not, no problem. We’ve got a fix for that.)

- Metal against Metal pressure canner. (All-American is my canner of choice, and yes, I can use it on my flat top stove, or my butane cook stove, or even an open fire if need be.)
- Parchment Paper: The single sheets work fine if your bacon is shorter—or you could always cut the bacon to the right length and use the pieces to stuff a bacon scraps jar. But if you’re bacon is longer you’ll need to use the rolls of parchment paper. You COULD use masking paper instead, which you can get at the hardware store for cheap. But I’m only interested in using food-grade paper. It doesn’t matter if the paper is white or brown.
- Scissors for cutting the bacon if necessary and for cutting the parchment paper to size
- A heavy, flat rock or brick: this is necessary when canning quart jars. The jars have quite a bit of air in them and thus they tend to float when immersed in just enough water to cover their lids. Yup, I actually have a canning rock now that I can bacon. *grin* (You could stack more jars on top and try that, but this just depends on how many your canner will hold.)
- Paper towels: you’ll use these to clean off the rims of the jars prior to putting the lids on them.
- 1/4 to 1/2 cup of vinegar
 I like to prebake my bacon at 375 degrees for about 10-15 minutes so that I get a good texture when I fry them up. This isn’t absolutely necessary if you don’t want to go through the hassle. It’s just the look and feel that I prefer and what I’ve come to experiment to be the best solution for some of the problems I’ve listed above. You don’t want the bacon crispy. You want just the edges to start crisping up but the bacon to still be pliable.
After you’re done baking the bacon,
Take a single sheet of parchment paper, (about 12 x 15 inches); the rolled parchment paper will be wider than that, but no problem.
Lay it flay on a clean smooth surface.
Lay 8 strips of thick cut bacon down on the paper parallel with the short side of the paper side by side each other, no overlapping necessary. If you are using non-thick bacon, then place two strips of bacon on top of each other, (you can bake them this way and save yourself some time) exactly aligned as much as possible; repeat that 8 times across the paper as you would the single strips of thick bacon. This little trick will help you to have nice strips of bacon rather than bacon that falls apart.
As your placing the bacon on the sheet, begin to the far left. You’ll have a little bit of space left over on the pre-cut sheets but if you’re using parchment rolls, then cut your sheets so that you do have about 4 inches excess on the right side.
 Once you’ve filled your sheet of bacon place another sheet of parchment paper on top of the bacon, smoothing it out flat and matching it end to end. I see many people miss this important step, but don’t skimp. Do it so that you get the final product that you’ll want when you get to open your jar full of this yummy stuff! Other than doubling the bacon to purposely create thicker pieces by double layering, you don’t want the bacon rolled on top of itself.
Fold the three layers in half lengthwise, directly in half. If you have paper up at the top that’s longer than the bacon, fold the excess paper in, towards you, and smooth the fold.
 Now tightly roll your multi-layered stack lengthwise (like a burrito), taking care to keep the loose edge of the parchment paper folded down as you go along. Again, you’ll want this to be nice and tight. As you get to the end of your length, the slick bacon may begin to get squeezed out a bit, but it shouldn’t be even as much as the width of a strip of bacon.
Now, if you have some bacon exposed on the far end of your roll, then cut a piece of parchment wide and long enough to wrap outside of your roll of bacon to create a smooth exterior, covering bacon that may have slipped out during your rolling.
 Now, place the roll with the smooth fold edge facing UP. This is so that you get as much of your bacon fat at the bottom of the jar while it’s being pressure canned. The grease is so much easier to use later when you do it this way. You may end up twisting and squeezing just a bit, but I’ve done this enough times that 8 pieces of bacon should fit perfectly in your wide-mouthed quart jars. If you attempt to do this with regular mouth jars, you’ll end up wasting a LOT of space in the jar and it will take you many more jars to get the job done as you’ll have a tough time getting 8 pieces of bacon to fit.
DO NOT ADD WATER to your jars.
Wipe the rims of your jars with a clean paper towel to ensure there’s no residue on it. Place the flat lid on the jar and then place the jar ring on, tightening it gently—only “fingertip tight”—as it’s called in the canning world.
 Place the metal rack/liner that comes with your pressure canner in the bottom of the pan. (It will help prevent your jars from cracking and breaking during the pressure canning process.) Then add at least 3 inches of water to the bottom of the pressure canner BEFORE you put your jars of food in the canner. Then place the number of quart jars in the pressure canner that fit. (Your manufacturer guidelines will tell you how much water you need for your canner) Add ¼ to ½ cup of white vinegar to the water. This will prevent the outside of your jars from getting corroded with calcium from the water and makes your jars nice and clean. Cover them with the second metal rack that comes with your pressure canner. Place your rock or brick on top of it to hold the jars in place during the pressure cooking process. This will ensure that the entire jar’s contents reach the pressure and heat necessary to be safely cooked and stored.
 Place the lid on the canner and “baton down the hatches”, sealing it up; but do NOT put the round weight on it yet. Bring your burner to high heat and wait until you have a hearty, steady stream of steam coming out of the valve. Allow this steam to continue for 10 minutes based on manufacturer’s directions. This is purging the air from your canner. Once the steam is steadily escaping, place your weight, at the 10 pound hole/indicator, on the valve. Now follow your manufacturer’s instructions in terms of how what to be mindful of during the canning process. My instructions state that the weight should only rattle once every 3 to 5 minutes. I adjust the heat downward gradually in order to maintain that. Your stove will vary, but mine usually ends up on the “2” setting or Med-Low, by the time I’ve got the perfect pressure. I’m constantly checking my gauge to make sure that I am maintaining the pressure at or above the 10 pounds.
IMPORTANT NOTE: You do not start counting your minutes of canning time UNTIL your canner has come up to the proper pressure.
 Once you’re finished pressure canning turn off the heat, carefully remove the weight from the valve (I use a towel or pot holder), and wait for the pressure to complete drop. (YES! You can do this, unless of course you want to cook your meat a little longer and let it shred to pieces or you want to wait all day for the pressure to drop naturally. A canner is much like a pressure cooker. Quick Release is an acceptable option for pressure release.)
Once the steam has fully escaped, then carefully open your canner with the lid facing away from you as more steam will escape. With a jar lifter, carefully lift the jars out of the canner and rest them on your counter (cover counter with towels to prevent burning or melting of the counter material, such as with a dish towel. You’re also doing this so that the temperature of the jars doesn’t drop too quickly and impact your seals.) Allow the jars to cool completely for 24 hours. Within the first 30 minutes of cooling you will begin to hear the lids popping. This is how you know they are sealing. When cooled, you will need to clean the outside of the jars with warm soapy water as grease may have escaped during the pressurizing process. It shouldn’t happen, but I’ve had some readers say that it did.
After the first 24 hours, gently re-tighten the lid rings to fingertip tight. Wash the exterior of the jars as necessary to remove any fat or other debris. Then keep the jars out for another 24 hours just to be certain that they have all sealed.
 You can test for sealing by pressing your finger in the center of the flat lid. If it “pops” up and down as you press it, it isn’t sealed and you’ll need to replace the flat lid, or just eat the bacon sooner, rather than later. Store in a cool, dark place. Your bacon is completely cooked and could be consumed directly from the jar.
 When it’s time for you to enjoy your crispy bacon strips my best suggestion to give you is to BAKE the bacon on a piece of stoneware at 375 for about 15 or 20 minutes. You can fry them in the skillet, but due to the pre-cooking the bacon’s already endured it’s likely to fall apart a bit for you. However if you used thick bacon strips or double-stacked the two bacon strips, you shouldn’t have this problem. Also, frying them in the skillet at a lower medium to medium high heat will also ensure your strips turn out beautiful.
One last little tip. Obviously you’ll want to save the grease that you’re apt to have at the bottom of the jars. But, if you save the parchment paper that you used to can the bacon as well, you’ve got a little extra tool for the next time you need to grease and flour a pan. Simply take a piece of the parchment and wipe it all over your pan. It’s got plenty of grease attached to it to serve this purpose.
And THAT’S how we do it Preparedness Pro style! Enjoy!


194 Comments
Gabby · March 15, 2012 at 9:37 am
Do you have a pic of the step where you have rolled the bacon & parchment with the overlap? I think I lost you there. Thanks.
Terri · March 15, 2012 at 9:45 am
Yeah! I’ve been looking forward to this post! Thank you for sharing your knowledge and experience with us! A couple of questions….I’ve always waited to remove the weight from the valve until after the pressure has gradually decreased to zero (which feels like forever), so, it’s not a problem to just pop it off right after “time’s up” , and you’ve removed it from the heat source? Also, somewhere along the way, I read that it’s not necessary to store canned goods with the canning ring in place…what do you think?
I am a bacon lover…and am so excited to get some stored away! Thank you so much, Kellene!
Kellene Bishop · March 15, 2012 at 5:08 pm
It’s not necessary to do the ring on the jar after you’ve sealed the jars.
Kellene Bishop · March 15, 2012 at 6:25 pm
It’s not a problem to pop it off so long as you have removed it from the heat source. I grab it with a pot holder, of course, as it will be very hot. And yes, you’re correct, after your jars seal, you do not need to use the rings any longer. In the Doomsday Prepper episode I was on, the gal in the Northeast who does so much canning, you can see her shelves packed with jars that have no rings on them.
Chelley · March 15, 2012 at 11:01 am
I was wondering what I was going to do after SHTF until I could get the hogs slaughtered and smoked. Now I know. Ty so much for all your tips and tricks. You are one of the reasons why I started hardcore prepping. How do you suggest I get antibiotics for med kit, when I’m not sick?
Linda Lallerstedt · March 15, 2012 at 5:32 pm
Me too, how to get anitbiotics before you need them? Thanks
Louise Raven · March 16, 2012 at 1:36 am
My ex husband used to just to to the feed and seed and get antibiotics intended for animals and dose himself….no prescription needed.
Kellene Bishop · March 16, 2012 at 2:57 am
I personally just can’t bring myself to do this. It’s bad enough that the pharmaceutical companies are given free reign to monitor themselves, but something marketed for cattle, etc. is perfectly able to have nasty by products added to it. So, I just can’t do it. I’ll stick to my essential oils that have been tried and true in the European medical community for decades.
Mizebay · March 16, 2012 at 3:17 am
Check out Ebay under Fish Antibiotics. You can buy the same antibiotics over the counter from vendors, that are used by humans, but since they are sold for fish, they do not require a Rx. In an “end times/ survival scenario”, it’s better to have it and not need it, than need it and not have it……….
Kellene Bishop · March 16, 2012 at 4:06 am
Seriously, you guys are making me really, really nervous embracing this particular approach. If the highly “regulated” and sterile requirements are used to manufacture Rx for humans still puts out awful drugs with horrible side effects, then what makes you comfortable using drugs not created for humans and with no regulation??
Prepared · March 26, 2012 at 1:30 pm
The animal antibiotics are produced at the same facilities as their human counterparts and to the same standards. The Fish antibiotics are identical in everyway to human ones and even a pharmacist cannot tell the difference between the pills.
Kellene Bishop · March 15, 2012 at 6:24 pm
pure essential oils are natural antibacterial and antiviral the best of which are oregano, rosemary, thyme, ravensara, and clove bud, as well as eucalyptus (radiata, not globulus species)
RaLene · March 15, 2012 at 11:20 am
Pictures, pictures, we must have pictures.
Holly · March 15, 2012 at 12:40 pm
I wish there were pictures! Next time you do this can you photo journal for us visual learners? Pretty please? =)
Kellene Bishop · March 15, 2012 at 6:10 pm
there are pictures, I just haven’t got them loaded yet. A gal does them for me who also raises 7 kids, works full time, and goes to school full time. Only a true friend would be that crazy to do them for me like that, but she’s keeper.
Julie · March 15, 2012 at 12:58 pm
Thank you for doing the leg work. How many pieces of bacon go in each bottle? You said three parchment papers, but only mentioned 8 pieces of bacon; so do you layer 16 pieces 8+8 before folding? That would make 3 papers.
Kellene Bishop · March 15, 2012 at 6:11 pm
8 strips of thick bacon, or 16 strips, the bacon double-stacked on each other, still creating 8 lines of bacon.
Patricia nerren · March 15, 2012 at 1:13 pm
My question is this and believe me I am not being critical, why did you fill the canner over the tops of jars then brick them like a water bath method. Is that just for bacon. My canner only recommends about 3 inches of water inside the canner. Where water bath requires canner to be filled over tops of jars. Please don’t tell me I have got to toss out my bacon and start over. I canned mine in 3 inches of water 10lbs for 90 min. I too used parchment paper and sandwiched bacon in between.
Kellene Bishop · March 15, 2012 at 5:01 pm
yes, it’s just for the bacon, using more water than necessary isn’t a bad thing. it simply circulates more heat around your jars and thus safely cooks them that much better. But the bacon jars, being so empty on the inside, will float. the amount of water will depend on this question–is there still a THIRD of clear headroom in your pressure canner? If the answer is yes, then you can use more water to more safely can,cook the bacon.
Kellene Bishop · March 15, 2012 at 6:22 pm
I do it as a safety precaution. YES, you can do 3 inches of water inside the canner. I can ALL of my meats with water just barely covering. You can take that extra precaution so long as you have the luxury of a really big canner with 1/3 more headspace than what you’ve got in there. No you don’t have to throw out your bacon. 🙂
Cowpiesnhorseapples: Jami · March 15, 2012 at 2:07 pm
Interesting. We are a small ranch(500 acres) and we raised our own bacon. Bacon is not an easy thing to grow. I can get sausage all day long. About half will have bacon. Than again, we are not in it to mass produce like big companies. There is nothing like farm fresh bacon! I will have to try this. We kinda keep all the bacon to ourselves ;o) This is a new way to make it last that much longer. Thanks
Rosie · March 15, 2012 at 2:14 pm
Please make a video for this technique. I would really love to see the process. Is the bacon uncooked when it is placed in the jar?
Kellene Bishop · March 15, 2012 at 4:59 pm
yup, it’s raw. The pics will help. sorry that there not up yet. My trusty Vicky does that for me.
Tfree · March 15, 2012 at 2:17 pm
Sound fun cant wait to try it, just need to barrow my moms All American canner… Im jealous she bought hers yrs n yrs ago for maybe $50 or $70 brand new… Anyway, I have a HUGE list of ‘Meats to Can’ for my shelves.
One ? what about any processed food such as polish dogs or hotdogs etc???
Kellene Bishop · March 15, 2012 at 6:12 pm
yes, it turns out you can can those as well.
Robin Hughes · March 15, 2012 at 2:29 pm
I’ve enjoyed your blog so far. A few thing I would like to point out. When pressure canning you only need a few inches of water. When the steam starts you need it to vents for at least 10 minutes before putting the weight on. Don’t remove the weight until the pressure valve has dropped. And do not tighten your rings or you may never get them off again. If you want to store your jars with the rings on, remove the rings and wash and dry the jars and rings. This will prevent you rings from glueing themselves to the jar.
I love my canned bacon. I always put them in the jar seam side down but I think I’ll try it your way.
Kellene Bishop · March 15, 2012 at 4:58 pm
Hey Robin, thanks for pitching in. A phone call to the jar manufacturer is where I learned the “finger tight” trick. This is also how the Tattler Lids manufacturer tells you to do it.
The venting waiting time will depend on how big your pressure canner is and the manufacturers directions as well as when to remove the weight during a recipe.
Kathy · March 15, 2012 at 2:46 pm
Could you tell me what model of pressure cooker you have and is it electric? Also how big is it?? I am looking into buying one but wanted to make sure I get a) one that is big enough and b) one that has been “tested” by others to know I am getting something that will last. Thanks for the tips and I love your site!!!
Kellene Bishop · March 15, 2012 at 4:56 pm
All American, metal against metal. Put in all american in your amazon.com search and you’ll find it right away. It’s not electric (seriously, do you think The Preparedness Pro would use electric if she didn’t have to? hee hee)
Deb · March 15, 2012 at 3:22 pm
You remove the weight immediately after turning the heat off? I thought that was after the canner cooled.
Kellene Bishop · March 15, 2012 at 6:14 pm
Unless you want to be waiting hours after you can before you can start another batch then you can wait for it to cool down naturally. But I’m a busy gal with lots to can.
Remove it from the heat, take the weight off, wait until all of the steam is expelled, and the pressure, and remove the lid.
This is just an oversized pressure cooker which you treat the exact same way.
Connie · March 16, 2012 at 3:38 pm
Correct me if I’m wrong, but doesn’t pulling the weight off before the pot has cooled sufficiently cause the jars to UNseal? And on the same subject, what’s the deal with making sure you don’t tip the jars as you remove them from the pot? I’ve done both (pulled the weight off too soon and tipped the jars, but not necessarily in the same batch) and some of my jars UNsealed, so I assumed this was the cause.
Always looking to be educated… 🙂
Kellene Bishop · March 16, 2012 at 6:19 pm
I think that that might be old wives tales. Canning really isn’t as all complicated as that. As I shared in the article, I wait a two days to check and double check. I’ve NEVER had a problem with jars sealing. AND I actually use what I store, not just leave it on the shelves. 🙂 That’s peace of mind. 🙂
Gary G · September 19, 2013 at 2:31 am
Hi, I have a PhD in food
Hi, I have a PhD in food science. I don’t say this to talk down, just to express my genuine concern for your health. Your technique is well documented and for the most part correct. However it is extremely important that you modify your practices and instructions. You should not remove the pressure weight until the pressure has come down on its own. The canning jars must cool in equilibrium with the canner. By removing the pressure regulator weight you are causing the jars to in turn vent into the canning chamber. There is high pressure in the jar which is then unbound by removing the high pressure around the jars. When the jars cool further, the contents (principally bacon fat, water and protein) will cool and contract causing vacuum. It is at this point that the jar which has now vented, while it does develop a tight seal later on, can suck in small amounts of bacteria laden air which you have now allowed into the canning vessel by prematurely removing the regulator. You have been fortunate not get sick yet. Bacon fat like all fats has a very low coefficient of expansion. It is actually the water portion of the bacon which causes the vacuum so the vacuum is lower than that of jars with lots of water in them. Also you should be adding some water to the jars. I would suggest enough to cover the bacon completely. You need water to circulate the heat through the jar so the the very core of your bacon roll reaches 240F and hold for at least 5 minutes to kill the botulism causing bacteria. The less water in your jar, the longer it takes to ensure full kill. Your suggested processing time by my estimation is too short. Also how you roll the bacon or how thick your bacon is will have an influence. The parchment paper type will also have an influence. Each technique will need a different processing time; either shorter or longer. In the food industry, special thermometers called thermocouples are inserted through the can wall to determine when killing temp is reached at the core. I don’t want you fine folks to get sick. Botulism toxin is colorless, odorless and does not necessarily bulge a lid. Botulism kills in a nasty way. Be careful and follow certified canning instructions.Call your local home extension if what you are planning to process is not in your book. Also your canner will be at proper pressure (and thus temperature) if it is venting roughly every 20 seconds or so for 5-10 seconds per burst. Inadequate pressure and thus heat will also compromise the processing cycle.
Stephanie · March 15, 2012 at 3:48 pm
I am lost here without pictures. Are you putting the paper in the jar? I just cannot visualize this folding technique. Sounds like a great idea but without some visualization I will just continue to roll the slabs into a tube shape and stuff into the jar.
Kellene Bishop · March 15, 2012 at 4:54 pm
rolling slabs into a tube, but folded in half, stuffing them in, paper and all, is exactly what you want to do. 🙂
Barb · March 15, 2012 at 3:57 pm
I am confused, why would you put enough water in a pressure cooker to cover the jars? That doesn’t make sense to me! I have done 1 lb of bacon in pint jars folding the bacon over on top of parchment paper. The bacon is also wrapped in parchment. I added no water in the jars (as you describe) and had the folded side up. I just put 2 quarts of water in my PC and pressure cooked as normal. Not using the extreme amount of water that you mention, that sounds like a water bath method and that would not be safe for canning meat.
Kellene Bishop · March 15, 2012 at 4:52 pm
Water bath method has nothing to do with the temperature or pressure that you use in a pressure canner nor the amount of time you cook it. There’s absolutely nothing wrong with putting the water just above the jars and in fact this is in the manufacturers instruction book I originally read for canning meat. All of my meat gets cooked starting out initially submerged. There’s no water bath method that requires 90 minutes at 10 pounds of pressure. 🙂 I do it this way to be a cautious as possible. And as long as I don’t have water in the jars, and am bottling the same thing each batch, I can reuse the water each time.
Stephanie · March 15, 2012 at 6:18 pm
Ok, I have a question again….why are you putting parchment paper into the jars? I know there is a reason but I just can’t figure it out. I must be dense to these newer processing ideas but am game to learn them. I just fold the bacon in half and roll it up tight and shove it into a jar. I have never had any issues with preparing the bacon afterwards. I would like to see a picture of the canned bacon after the canning process .
Kellene Bishop · March 15, 2012 at 8:10 pm
parchment keeps them flat while cooking, and ensures that they don’t stick to one another. If they do, then you can end up shredding or crumbling your bacon while you prepare it for frying.
Duana Blakey · March 15, 2012 at 6:38 pm
Thank you!! I also get my bacon from Zaycon foods [LOVE THEM] but have just been vacuum sealing then freezing it. I am excited to try canning it the next time around.
Pam · March 15, 2012 at 7:59 pm
I am confused about how much water you put in your pressure canner. Mine calls for only 3-4 qts. of water and everything works fine and there is no floating issue.
Kellene Bishop · March 15, 2012 at 8:09 pm
it’s not “wrong” to do it that way, neither is it wrong to do it the way I do. I’m just taking an extra precaution with the way I cook my meats.
Helen · March 15, 2012 at 8:20 pm
Is a metal-on-metal canner the ONLY kind you can use? I have a Mirro canner with the V-type rubber (?) seal and was hoping to use it.
I REALLY want to can my meats, especially, the bacon! I’m not a foodie but as far as I’m concerned bacon is at the top of my food pyramid. 🙂
Thanks for the detailed info. I’m really looking forward to the pictures as I’m one of the visually challenged readers here.:)
Kellene Bishop · March 15, 2012 at 8:23 pm
Sure you can use it, it’s just not going to last you as long and you’ll have more problems with it on your hands through repeated use. I always like to start with the good stuff that I could count my life on if need be.
Helen · March 15, 2012 at 9:02 pm
Thanks, Kellene,
As the canner was free and I’m just now starting to learn to do this, it should get me through the “learning curve”. In time, as I’ve saved up enough from being able to buy more items in bulk and at lower costs, I hope to upgrade.
No need to post this or reply to it. Just wanted you to know I appreciate your thoughtfulness when you do respond.
Kellene Bishop · March 16, 2012 at 12:35 am
My pleasure, Helen.
Alan in Oregon · March 15, 2012 at 9:31 pm
We live in Eastern Oregon, we have a Safeway store that about once a month puts their smoked thick cut Store brand , 3 lb. package on sale for 8.95, that a great deal at 2.99 a pound. Also their is usually a 10.00 off coupon with any 75.00 purchase, when this combination hit the weekly ad we stock up ,on whole chickens at 79 cents a pound pork sirloins at 1.99 lb., Pork loin rolls from Hormel at 5.00 each and use printable Hormel 1.00 coupon , bringing the down to 4.00 each. easy to load up once a month for 75.00 and get 10.00 worth of free Bacon!
Kellene Bishop · March 16, 2012 at 1:27 am
I love, love, love these kinds of deals, and now I don’t have to worry about freezer space…just shelf space throughout the house. Here we go again “Oops, don’t step on the meat there.” hee hee
(edited for spam content) · March 15, 2012 at 11:10 pm
Bacon is the candy bar of meats! With the wild pig problem we have now (which is so tasty), i just wish they had enough belly fat to even get bacon off them. I think a lot of us are going to be living off wild pigs someday.
Kellene Bishop · March 16, 2012 at 1:25 am
Try canning just the pork fat one of these times. It’s GREAT–at least so far. I’ve read plenty but just recently tried it myself.
Connie · March 16, 2012 at 1:18 am
We don’t eat pork bacon, but do use turkey and chicken bacon–which doesn’t have as much fat, of course. Would this method work for that?
Also, I’m curious–aren’t you supposed to get rid of as much fat as possible when canning? I thought the fat prevented a seal??
I am enjoying your blog very much–getting a great eduation! Thanks so much!
Kellene Bishop · March 16, 2012 at 1:23 am
Connie, canning meat has very little limitations. I might be inclined to put some water in the jars with those other alternatives. And no, you don’t need to get rid of the fat for successful cooking. You do know you can purchase blocks of lard in the grocery store–not even in the refrigerated section of the store, don’t ya?
Fat doesn’t prevent the seal, but fat left on the rim will prevent it from sealing. You’re likely to be grateful for that bacon fat someday. In fact, I’ve recently canned JUST lard. I’ll let you know how it turns out in a year or so. *grin*
Connie · March 16, 2012 at 3:33 pm
Have you tried canning butter? I’ve heard pros and cons and don’t know whether I want to tackle that or not. Thanks.
Kellene Bishop · March 16, 2012 at 6:20 pm
I’d suggest you do a search on “canning butter” on this site. I think you’ll be pleasantly surprised with what you find. 🙂
Jamie · March 16, 2012 at 2:30 am
Kellene, I think I know my problem with canned bacon as I ran out of parchament paper and I think my work around paper soaked up the flavors. The bacon was fine to cook even in a frying pan though just a bit less flavor than I wanted. Cash & Carry has a good bacon for $2.59 for 15 pounds until the 24th of March. It’s more of a salty tasting bacon rather than sweet. I prefer a salty bacon rather than sweet flavored bacon.
Kellene have you eve tried to can corned beef? I’m seeing quite a lot in the stores for ST. Patricks Day and reading a bit about folks survining the depression on canned corned beef. I may take a swing at it if after the 17th it drops under $2.10 per pound for the brisket/corned beef.
Kellene Bishop · March 16, 2012 at 2:55 am
I’m looking forward to getting a killer deal on corned beef after St. Patty’s day when they go on clearance. I have a GREAT corned beef and cabbage recipe that I love to make!
Renee · March 16, 2012 at 2:38 am
Wonderful…………as usual!!!! I can’t wait till the pictures, i’m not sure what side of the brain needs pictures but that’s the side i am. Thanks for all the wonderful articles, information and thank Vicky also.
Renee
Laurie · March 16, 2012 at 6:57 am
I recently found your site and bookmarked it. Loving it! I recently “borrowed my mom’s pressure cooker and am a little nervous, but you make it look and sound easy. 2 questions: It only has a weight on top, no pressure gauge, so do I just go by time and steam? #2. I have heard that you can’t can on a glass top stove with either a water bath or pressure cooker, because of inconsistent heating. do you use a glass top for all your canning? My stove is also a glass top.
p.s.
I read your warning about storing water asap, no one would tell you why. I’m with you, better safe than sorry so my hubbie and I filled 20 food grade buckets with water and stacked them up today. (he gets them free from work and had food in them) I do a bleach wash and then fill them with water and several drops of bleach to hopefully avoid weird odor. can’t beat free 🙂 We do have lots of other water storage and live by a creek, but a little extra never hurts. Thanks for sharing!!!!
Laurie
Kellene Bishop · March 16, 2012 at 2:07 pm
ok. so you’re going to want to use your ears on this one. You’ll know that you’re at the appropriate pressure based on the amount of sound your pressure cooker will make. You want it at a constant “ppffft” sound with an occasional rattle on the weight every 3 to 5 minutes. You’ll want it at that level for a full 90 minutes to be on the safe side.
Yes, I use my flat top stove for everything. as long as I’ve got the pressure I want for the whole thing, then what do I care whether or not it disburses heat evenly? 🙂
ValerieK · March 16, 2012 at 3:57 pm
Thank you so much for including pictures! When I first read it, I was alittle confused by the process (having never canned before). Now I understand! Oh and BTW, I got my pressure cooker and canning supplies yesterday! Can’t wait to try it out on chicken and bacon!
Kellene Bishop · March 16, 2012 at 6:17 pm
OOh! So excited for you! Yay!!
Shari · March 16, 2012 at 5:42 pm
Can you can turkey bacon?
Kellene Bishop · March 16, 2012 at 6:15 pm
sure you can can that 🙂
Shari · March 16, 2012 at 7:12 pm
Would you can it the same way you can regular bacon? I’m so new at all of this. I have purchased a pressure cooker, food saver, dehydrator, etc…. I have been researching for a month now on how to put up food for long term storage and it is all a little overwhelming.
Kellene Bishop · March 16, 2012 at 8:13 pm
If you want it in strips, then do it with the parchment paper. If it doesn’t matter, then just follow the brief instructions that I give in the earlier part of the article. Easy peezy.
Shari · March 16, 2012 at 7:18 pm
What is the processing time on 1/2 pints. I want to can ground beef(and other meats) for when it is just my husband and I eating. (canning for two) I end up making to much meat for spaghetti or taco and end up throwing it out. What a waste of food in times like these.
Kellene Bishop · March 16, 2012 at 8:16 pm
for ground meats you’d go 90 minutes regardless of the size to be on the safe side, IMO.
Jeanie · March 17, 2012 at 1:50 am
Kellene, I don’t own a pressure cooker but do a lot of water bath canning on the stove top. I have never canned meat though and wondered if you thought it would be a good idea to can meat in a water bath or would you only can it in a pressure cooker?
Kellene Bishop · March 17, 2012 at 4:10 am
no, you absolutely cannot can meat with a water bath. You need both pressure and heat and for a sustained period of time. Sorry.
Helen · March 17, 2012 at 1:57 am
Thanks for the pictures. If I can “see” it in my mind, I can usually do it and this gets me way closer to done. 🙂
Is there any particular food which is easiest for my first time canning effort? Or, should I just pick one and go for it?
P.S. NatGeo is showing your episode of DDPs again this week in our area. Looking forward to seeing it again!
Kellene Bishop · March 17, 2012 at 4:10 am
I started with chicken, but really, all meats are very easy. Bacon STRIPS is the only one that requires any fussing. Good luck!
Renee · March 17, 2012 at 3:39 am
The pictures help out so much, i think my one sided brain might even grasp this. What a great feeling having so much wonderful bacon.. :). Bacon is suck a good things.
Can’t wait to see you future class schedule after last weekend i’m hooked, i want them all.
Renee
Bonne Campbell · March 17, 2012 at 2:13 pm
“Stoneware Bar Pan” on my list of “must buys”. Thanks a million Kellene~awesome tut!
Jeanie · March 17, 2012 at 5:44 pm
So what do you do with the jars of bacon that are waiting their turn in the pressure canner? Say you have one batch in and another batch waiting. It wouldn’t be good to let that sit out for 1 1/2hrs. You can’t put it in the frig, you wouldn’t want to put cold jars in the canner. Not just for the bacon, I mean for whatever it is you are canning. I know you could do the bacon in separate batches but what if you are doing say jelly?
Kellene Bishop · March 17, 2012 at 8:15 pm
Actually, all rolled up and put into a clean, sealed environment, I have no problem putting those on the counter waiting their turn. But if it’s overnight, then it goes in the fridge, and then brought up in temperature on the counters before I put them in the canner the next day. I’ve got to say though that the impatient, lazy prepper in me says “Get another canner!” 🙂
debbie s · March 17, 2012 at 11:42 pm
kellene,
loved watching you on “preppers”! i did look up zaycon and they were coming to our area. a friend and i both put in a bacon order. it was great. i have 2 aa canners and love them. this was the first time i canned bacon tho. i tried it w the paper and without. i found sausage links the same day for $1/lb at the local grocer and bought a case of those , also. so i had a very long day canning as i put the sausages in jars, too. i like having the grease in the jars. i figure it gives me something to fry my egg in or to make some gravy to go along w that meat. keep up the good work . love you!
RayK · March 18, 2012 at 9:43 am
Thanks for the great info, but there are a couple of things that need to be addressed.
1. You don’t need to fill the canner with water if you are pressure canning. Two inches of water should be plenty. It’s the steam under pressure that does the work, not the water that generates the steam.
2. If your canner is tall enough, you can have the jars above the water and not have to use the brick.
3. When you fill the canner and apply heat, you need to let steam escape for 10 minutes before putting on the weight. This purges the air from the canner, which is necessary if you want to achieve the correct canning temperature. Too low a temperature can lead to spoilage or botulism.
The Ball Blue Book of Canning is a long standing reference source for food preserving. If you are unsure of anything on canning, they have the answers.
Ray
Kellene Bishop · March 19, 2012 at 6:49 pm
Ray, you’re absolutely right that you don’t need to cover the jars. That is a preference of mine, and one which I will not be able to hold to when I’m urgently conserving water. However, keep in mind that the number of inches of water will be determined by the manufacturer’s directions.
2) Again, correct, but the pint jars that still fit weren’t heavy enough to hold them down, so a brick it is. 🙂
3) you’re right that the steam escaping purges the air from the pressure canner. I like how you said that much better than I thought to. Again though, Folks, keep in mind that HOW LONG that steam escapes is going to be noted in your manufacturer’s instructions.
Thanks for helping me to know what I needed to go back and clear up.
Bill · March 18, 2012 at 6:47 pm
Great information, thanks. I canned 3 pints and when I took them out the jars were only half full, will it still be good with all of the head space? Thanks
Kellene Bishop · March 19, 2012 at 6:46 pm
absolutely. I’m talking about headroom in the pot, not the jars.
Doris Gruber · March 18, 2012 at 7:57 pm
Kelleene, What does SAF stand for in the yeast. Is all yeast freezable, or just the SAF yeast? Where is the best place to buy this freezable yeast?
Thanks
Doris
Shiral · March 19, 2012 at 4:44 pm
I hope I am posting this correctly. I have canned for years, but never canned before now. I pressure canned my meat at 11 pounds, 75 minutes for pints, and 90 minutes for quarts. I used the 3 quarts of water in the pressure canner that did not put the water level over the jars. I am concerned now, that maybe I did not process long enough for my pints. The instructions per manufacturer of pressure canner(presto) which uses weight plus pressure gauge was 11 pounds at sea level. Should I be concerned about the ground beef and chicken I canned?
Kellene Bishop · March 19, 2012 at 6:45 pm
You’re totally fine not covering the jars. I need to take time to clarify that in my instructions. You can breathe easy on your other canned meats as well.
kc · March 20, 2012 at 12:29 pm
Hi, wondering about canning sausage patties in a similiar fashion……make a patty separate with parchment paper and just continue stacking the patties like this with parchment paper in between……or do you can sausage like ground beef where you brown it first, but then you couldn’t have sausage patties? kc
Kellene Bishop · March 20, 2012 at 7:25 pm
If you want them to remain in patties, I’d brown them first, then do the parchment and then the pressure canning. Just my opinion.
polly · March 20, 2012 at 3:28 pm
THINK PEOPLE. Do you REALLY think the meds that the big drug companies produce for animals are on a different line then the people meds? It is all the same. People meds cost more because A) malpractice ins B) they can get it C) advertizing etc D) over head of drug stores, Dr , sales reps etc. Vet supplies come from the same batches. My vet even uses many products on himself. I am sure he would not if he thought they were different that main stream. I am amazed that people don’t THINK about production and manufacturing. Like they are going to have a mulit million $ facility for people and another one for livestock/pets Sheesh !
Kellene Bishop · March 20, 2012 at 7:26 pm
Clearly this is something you feel strongly about. I personally would not take the chance. But then again, I’m taking as few chances on big Pharma as possible in my long term plans.
The FDA actually outlines their requirements for different production procedures, FYI. Big Pharma isn’t a victim here. They have those overhead costs because they create them. A loaf of bread, for example, has a markup of approximately 6%. Yet you don’t see bread companies hiring wealthy law firms, schmoozing powerful politicians, and hiring 6-figure representatives.
Another thing that I haven’t seen for myself as of yet is anything from big pharma that says their manufacturing process is the same. But I have seen the manu. criteria.
It makes sense to me that it would be a decent back-up option, but at this point in my research, I cannot condone it, and since it’s my site and my backside that will get sued by some litigious hack who gets a bad batch of respiratory steroids intended for a cow that has multiple stomachs, then I have to make my position clear on the matter.
Kathleen · March 20, 2012 at 5:43 pm
i have a glass top stove with a booklet that doesn’t say anything about avoiding canners,pressures canners.etc..I asked at the store I bought it from and they had no clue if it was ok.However,my pressure canner box as well as some stockpot tags say not to use on a glass top stove.Is this a weight issue that will make the top break or is it just a warning about uneven heating?My hubby went out and bought a hot plate as well as propane outdoor cooktop just in case.
Kellene Bishop · March 20, 2012 at 6:42 pm
It’s an issue of proper heat dispersion. The older ones weren’t very good at it. But I have one that’s at least 15 years old and it’s been just fine for me. I use it for EVERYTHING.
Kathleen · March 20, 2012 at 6:54 pm
thanks for the quick answer!no one seemed to know and being its a little over a year old,we were concerned.friends had theirs crack but not due to canning.hope you are feeling much better.
Janae Pepper · March 20, 2012 at 7:32 pm
Ok so i have NEVER canned in my life and just bought a pressure canner/cooker from walmart wih some jars…im soooo sared to use it I have tons of oranges and want to an them but Im scared I dont now what Im doing 🙁 and since it says pressure canner and cooker im guessing I can pressure cook a meal in it as well??
Janae Pepper · March 20, 2012 at 7:36 pm
OH can I use this pressure canner on a gas range or do I have to use a flat electric range ?
Doris Gruber · March 21, 2012 at 11:24 pm
Kelleen, How do I inventory my food supplies? Any suggestions?
Margaret · March 23, 2012 at 4:40 am
I was wondering about your instructions for canning bacon. I have an aluminum canner with pressure guage but it has a rubber ring in it. I have used it to can meat before. You say to use a metal on metal canner. Is this something I need to change? It sounds like investing a lot more money. Thank you for all the great information. The egg and cheese preserving are also very interesting to me.
Kellene Bishop · March 24, 2012 at 2:29 am
I should have stated that if you were to invest in a pressure canner you’ll want to make sure you get a metal against metal–it will last longer with fewer vulnerabilities over longer term use. But you’re fine using whatever kind of pressure canner for canning this in.
Becky Bowles · March 24, 2012 at 1:38 am
When you are referring to parchment paper, are you speaking about wax paper? I heard wax paper referred as “parchment paper”, from my mother when she was alive.
Since they are two different products, I would like to make sure my bacon is lined up and ready to go. Thank you for this hint, it is just wonderful. I now have to borrow my friends mother so she can teach me how to use a pressure cooker.
Kellene Bishop · March 24, 2012 at 2:28 am
Nope, you’ll want to use actual parchment paper. You won’t like what you end up with if you use wax paper.
Jamie · March 24, 2012 at 7:45 am
My own observations
1. If your stove can boil 2-3 gallon pot of water you should be okay.
2. If you are concerned over breaking your stove you can buy a hot plate for under $30.00 and do a nice job if a bit slow. I like the solid burner type oppsed to the coil type. I loaned mine to a neighbor that had an older glass top stove that could not boil more than a gallon of water in a good size pot.
I really hate the glass topped stoves they retain way to much heat and are very delicate. I prefer a gas range or an old fashioned electric range.
3. Get several rolls of parchament paper in your local mega-mart bakery aisle. It will save you on oiling baking pans and there are some great recipes especially for fish that are steamed in paper. Plus it makes cleanup a breeze.
Jack · March 25, 2012 at 11:54 am
Thank you very much for great article and very well explained instructions. They seem fine to me without added pics. I’m planning on buying a AA canner soon. My group of friends are all prepping but need more food, we are more than well off on arms. So it makes sense to be responsible and store food, comm, etc etc. the worse sort of persons in a meltdown are well armed and having no food. I think the wild pig “problem” will be a blessing in hard times. A few things I’m not seeing 100% on the canning. If the cans are under water it doesn’t seem like they would have any pressure since water cannot be compressed. Maybe the overhead pressure brings the solid water to 250 degrees. Also the canner wouldn’t loose all of its air or it would create a vacuum which is negative pressure.
Either way it obviously worked submerged or partially submerged. That is all that matters. This is almost like a 9mm vs 45 debate. Lol
My thoughts about the meds are this. Antibiotics for fish are likely as good or better than human meds. I used to keep salt water reef fishes and corals. They are so much more sensitive to environmental toxins than we are its incomparable. Sorta like comparing a newborn baby to a crocodile. We would be the croc and the reef animals the new born baby. Tap water will kill these animals. You have to us DI/RO carbon filtration or distilled. So any meds won’t be full of pollutants if they come from a reliable source. Cattle and horse I have no clue….but have you seen the prices of a thoroughbred these days? Anyway thanks for perfectly timed meat canning article, btw I loved the comment on natgeo about six months after disaster and still being overweight. Thumbs up to that!
Kellene Bishop · March 26, 2012 at 6:37 am
I have nearly 500 jars of canned meat downstairs that stand as a testament that the cans underwater are not a deal breaker in your canning efforts. I assure you, I only share with you guys what I do and rely on for my own family and loved ones. Ultimately, follow your canners factory manufacturer instructions and you’ll be fine.
The water isn’t getting compressed, it’s the space within the jars that is.
I definitely will have to do some more research on the whole veterinarian approach to medicines. It’s at least worth checking into I think.
Jack · March 26, 2012 at 2:59 pm
500 jars is awesome, I’ll look into buying some stuff this week. Is there a certain lid system you like best? Money isn’t an issue. Thanks
Kellene Bishop · March 26, 2012 at 8:31 pm
I love, love, love the Tattler Lids. They have been around since the late 1970’s, they are reusable canning lids, BPA free, and they are awesome. The other night I had a dream that I was one The Price is Right, and because I live this way, I was able to appropriately guess the price of the Tattler Lids and I won $1,000 worth of Tattler Lids! It’s pretty bad when you’re dreaming and fantasizing about a canning lid, eh? 🙂
Jack · March 26, 2012 at 11:45 pm
Question, if I were to can homemade turkey chilli with beans would I cook it before canning? I usually use can beans but I guess dry beans could also work?
Bought my first case of jars today for your bacon instructions. Still gotta buy canner this week or next.
Kellene Bishop · March 27, 2012 at 12:26 am
you’d definitely have to make it all first and then can it. I highly recommend you purchase a book on canning such as the one available from the Ball Blue group.
Bob Smith · September 28, 2012 at 3:14 am
Jack, two options. 1. use dry beans, soak ovenight, cook 60minutes then add to chili and simer 30 min before canning. or 2. can chili without beans, then add beans when you open th ecan to use, same as you do today.
Jack · March 28, 2012 at 6:38 pm
Thanks I got one book yesterday at honeyville and will prob buy a couple more for variety.
Matthew · March 29, 2012 at 9:58 pm
Kellene, is there a rhyme or reason to what is offered at zaycon? I just came back to it after a few months of not paying attention to them and they just have chicken again. Did I miss the wonderfull bacon wave in my area(San Diego)?
Kellene Bishop · March 29, 2012 at 11:41 pm
Yes, since the order locally for the most part, their schedule is based on what they can get locally. They did just have a big bacon event last month. We’re at ground beef again and haven’t had chicken for about 5 months. Don’t worry. What you want will come around again.
Sherry · March 31, 2012 at 3:03 am
Very Interesting I never knew yiou could can Bacon…
Carey · March 31, 2012 at 8:29 pm
I have never canned meat of any kind before but Kellenes instructions for the Bacon are very clear and I am ordering the All American pressure canner and now I will try this. Kellene you should write a cookbook on canning meats and really on all your recipes.
Kellene Bishop · April 1, 2012 at 1:24 am
Oh believe me, Carey, I’m working on it. It takes a LOT longer than I thought. I cook visually a LOT of times and that doesn’t make for a good cookbook. I also experiment a LOT and that doesn’t always turn out right. Plus, I function at about 65% for that kind of stuff as of late, so it is sure taking me a while. But it’s definitely in the works.
atasteofcreole · April 15, 2012 at 11:28 pm
I can all kinds of meat. It’s ALWAYS 11# (up to 100 0 ft) 90 minutes for pints and quarts. For stock its 11# for 90 minutes with juice only!
Verron · April 1, 2012 at 4:21 am
What is the shelf life of canned bacon?
Kellene Bishop · April 1, 2012 at 5:14 am
As per the article it’s 10 years assuming ideal storage conditions.
pam · April 1, 2012 at 4:50 am
Would you please tell me, if you would, if you got the blessing of an extension service for canning bacon? All my research indicates that bacon is unsafe to can because of it’s high fat content, plus the fact the method you use (and others) doesn’t have water to help pass the heat through (density issues). If you don’t have an approved, scientific method, how do you know it’s being done properly? I’m nervous about your methods. If you are doing this just because you can, then you might want to re-think it. A lab should be able to show that botulism is completely out of the picture using your methods.
Kellene Bishop · April 1, 2012 at 5:14 am
Pam, I will NEVER seek after the approval of the extension services for any of my preservation efforts, nor the USDA. I do not recognize their authority on these matters and many other like them. They also say that you can’t bottle butter or preserve eggs outside of refrigeration. As I always say, if it can be done in the stores, it can be done in your home, the trick is just figuring out how so that it can be done safely. Also, if you’re merely getting your information from the internet, rather than books which carry a higher level of liability, then you’re apt to find misinformation as well.
Having said that though, I don’t suggest that anyone should bring anything into their home that they aren’t comfortable with otherwise they will defeat the feeling of peace in being prepared and instead just give themselves one more thing to worry about. So if you don’t feel comfortable doing it, then so be it.
I’m very comfortable using tried and true methods that have been around long before USDA and extension services. Additionally, and even more important, we never just store food and forget about it. We’re always using it so we don’t end up with some major surprise or major illness in a time of crisis. Also I never write about something that I am not willing to do and/or experience doing myself or at the very least receive feedback from experts that will go on the record.
(and just so you know in the future, we don’t typically allow links to any other websites posted on our site until we have time to review the information and feel that it merits my thumbs up.)
Deana · April 3, 2012 at 3:09 am
Would you ever use a steam canner? If so what would you use in? Thanks for all your info. You are helping slot of us.
Kellene Bishop · April 3, 2012 at 3:12 am
A steam canner is not appropriate for the canning of meats.
Que Sera · April 3, 2012 at 7:44 pm
LOVED the assembly line pic! And I’ve read a few articles about canning bacon, and yours is the first (I’ve read) that specifies the direction of the fold to assist the fat towards the bottom, cool!
I’m not sure if the “sciences” are related, but would there be any risk of exploding rocks/bricks from air pockets, like some warnings about cooking on rocks like the American Indians supposedly used? Just guessing, but maybe the rock might be more risky than a brick, but I’m not that up on this kind of science.
Kellene Bishop · April 3, 2012 at 7:54 pm
I’m not concerned about the rock whatsoever. And if the rock makes someone uncomfortable, they don’t need to use it. I would use it regardless of whether or not I cover the jars with water, or only use 3 inches or so of water because I don’t want the jars dancing around during the process. They simply aren’t as heavy as the other things I can.
Jan · April 12, 2012 at 9:45 pm
Hey, I canned some chicken and when I opened the pressure cooker one of the quart jars was broken and this made the chicken from that jar float around the other jars that sealed.. Do you think that it will be alright to eat the quarts that came out and sealed..? Thanks!! Oh, I love your energy and your information!! I’d say you could be the next Paula Deen (ya’ll) :). Jan
Kellene Bishop · April 13, 2012 at 2:56 am
Did you have water covering the jars or not? If you didn’t have the water covering the other jars, then yes, you’ll be ok with the ones that sealed.
Natalia · April 16, 2012 at 8:49 pm
Thank you for the wonderful tips and everything else you write about..but I do have a question…Can you can turkey bacon? I was going to do so tonight then realized I was totally lost on the subject of canning turkey bacon!!!=) Thanks for everything
Kellene Bishop · April 16, 2012 at 9:21 pm
Sure, no problem. I’d do it the exact same way. You’ll obviously have very little fat at the bottom of the jar though.
Sue · April 17, 2012 at 10:23 pm
Thank you for your clear directions and pictures. It will be very helpful. I have been learning to can soups and stews and am ready to tackle just plain MEAT!
A couple of questions: Would you ever cook the bacon first so it is golden brown and not need cooking after opening? Since there are only two of us, how many pieces of bacon do you think would fit into a pint jar? 4? (1/2 of the quart in all measures?)
A laugh: “baton down the hatches” will not work. LOL a baton is used by a musical director. You mean “batten” which is the covering of the hatch. Batten the hatches means to cover the hatch with a tarp to keep out rain water. A baton won’t work for that. 😉 But, batten down the bacon does make sense…
Thank you for your directions. Sue
Sue · April 17, 2012 at 10:29 pm
Another question, please. If it is possible to can butter, can we “can” bacon fat the same way? I just cannot imagine living without it.
Thanks.
Shannon · April 20, 2012 at 12:44 pm
I’ve always read to turn off the burner and let the pressure go down before opening the lid or the jars will break! Have you had jars break by taking off the pressure guage while still under pressure?
Kellene Bishop · April 20, 2012 at 3:27 pm
no.
Shannon G · July 7, 2013 at 3:44 am
Most of the canning books I have tell you to let the pressure go down on its own before removing the weight. I don’t believe it will have an ill effect on the canned bacon because you are not using fluid in the jar, but when you are canning something with a liquid it can cause most of the liquid to escape the jar. (I made that mistake personally quite a few times before I discovered what I was doing wrong!)
Kellene Bishop · July 8, 2013 at 7:09 pm
I’ve done this method both WITH liquid in the jar and without. Keep in mind that I don’t put my canning jars away until a couple of weeks after they’ve been canned in order to ensure that they are still sealed. So far, so good over the past decade, just FYI.
Justin · April 22, 2012 at 2:22 am
I have not made an attempt at canning as of yet. Do you suggest any certian reading material before I get started?
Kellene Bishop · April 22, 2012 at 5:19 am
The instructions that will come with your canner will give you TONS of info. But I also suggest you read the article about “canning meat” on here as well. You’ll get hooked for sure!
Quiverfull4x · April 23, 2012 at 2:02 am
Kellene, Just finished my first batch of BACON! My grandmother has canned all her life and I have grown up at her knee. We do all kinds of fruit, veggies, jams, jellies, and fish. But we have never canned bacon. It was a must for my husband! How could our pantry be complete with out butter or bacon? You have been such a blessing. Thank you.
Connie · May 7, 2012 at 5:12 pm
Kalleen, We just made our first batch of canned bacon. It was very easy using your step by step instructions and it turned out great. We used Zaycon
bacon and had to double it up as you suggested. Once jar did not seal so it
was our opportunity to see how it cooked up and what it tasted like. Very good on both accounts. My questions are : Can you separate the two pieces of bacon or just expect that they are fused together, making it less economical? and secondly, what is the best way to store once the jar is opened and how long will it last in the refrigerator ? Thank you for all your
great information.
Kellene Bishop · May 7, 2012 at 6:57 pm
Glad to hear it worked out well. I just fry the 2 pieces together. Many times during the frying process though they separate. It’s still the same as 2 pieces for cooking purposes, but for serving as a singular side dish, it just is what it is. I’ve stored opened jars as long as 4 weeks in my refrigerator. I just store it that way in the jar. I haven’t done it a lot though because I usually don’t get into them unless I know I can go through the whole jar. There aren’t many occasions in which I don’t.
Sarah · May 7, 2012 at 11:18 pm
I’m VERY new to canning but had to give this a try. Everything tastes better with bacon:) Great directions and great results. Thank you so much!!!!
Connie · May 12, 2012 at 3:55 pm
Kelleen, Is it possible to can meats from frozen and thawed meat?
Any special concerns as to time in canner? Our local grocery store has a pretty good sale on pork sirloin right now but I don’t have the time this weekI end to can it. Many thanks for all your great work.
Kellene Bishop · May 12, 2012 at 6:02 pm
No, I understand that problem perfectly. and it’s just fine to do it that way.
Tracie · May 23, 2012 at 6:04 pm
I have purchased meat and put in the the freezer to can at a later time. I have been doing this for 20 years and have never had any problems. Its a great way to stock up on supplies then spend a full day canning.
Kellene Bishop · May 23, 2012 at 6:09 pm
yeah, until you lose your electricity. And frozen meats do NOT have a 5-10 year shelf-life. Whereas canned meat does. This IS a Preparedness site, after all. 🙂
PaleoBabe · May 24, 2012 at 9:22 pm
Thanks for this article. We get bacon, ground beef and chicken from Zaycon and we’re due to pick up bacon in a week. I have been trying to figure out what I was going to do with all that bacon!
SpicySalsa · May 29, 2012 at 6:31 pm
I finally opened up the bacon I canned from a few months ago just to give it a try. I was thinking it would look like the precooked bacon you find at the store but mine looked underdone. I still fried it up in the pan and it was great but am concerned that perhaps I didn’t cook it long enough. I used quart jars, with 10 pounds of pressure for 90 minutes after my weight stated rocking as stated for my canner. What should my finished product look like?
Kellene Bishop · May 29, 2012 at 9:54 pm
It will look like raw bacon because you’re essentially “poaching it.” You won’t get the crispy look without frying it.
SpicySalsa · May 29, 2012 at 11:26 pm
That is good to know. I thought maybe I did something wrong but it fried up nice. Hubby loved it. Thanks for all the info!
Denise Horn · June 12, 2012 at 7:32 pm
I’m a newbie to pressure canning and I can’t seem to get the pressure to stay between 10 & 11#. If the bacon (or anything else) is done at a higher pressure than recommended will it destroy the flavor or do anything undesirable to the meat?
Kellene Bishop · June 13, 2012 at 3:34 am
No, being in a higher elevation I’m usually using the 15 pounds of pressure anyway. No problem.
Denise Horn · June 13, 2012 at 1:49 pm
Thank you so much for sharing your knowledge. I really appreciate it!
Wendy · July 11, 2012 at 4:37 am
Once again you inspired me. I did my first 15lbs of bacon lastnight. As I was taking them out of the canner I realized I put the folded side in the bottom of the jar, opposite what you said to do. Darn, that’s what happens when you let the hubby interrupt you at a critical step. Oh well, I know it will still taste great just might not get to use as much of the bacon grease. Thanks for all your tips. I always check my canning books, check your site for “easy” steps, then start canning. You always save me time and effort. Like you always say “lazy preparedness.” LOVE IT! Any thoughts on alternate ways to use cranberry juice? Got several bottles for free with coupons and I would love to do something besides just drink it. I make jelly with the grape juice I get for free but didn’t know what to do with the cranberry juice.
Kellene Bishop · July 11, 2012 at 4:47 am
Cranberry juice is a great alternative to recipes which call for red wine, actually. I also like to use it with pork and also with this delicious rice parfait in which I mix reduced cranberry juice with smooth white rice and fluffy cream. Yum! I’d made cranberry sauce with it too if I had an abundance. Did you know that cranberry sauce goes great with salmon? Yum!
Wendy · July 11, 2012 at 5:52 am
Thanks for the ideas. I thought about trying to make cranberry sauce but haven’t found a recipe and process yet for long term storage, only “fresh”. I’m sure it would be similar to making jelly. Oh, please share your rice parfait recipe, sounds delicious!
Cheryl · July 15, 2012 at 4:05 am
I have never heard of metal to metal canners. You mentioned steam not acceptable for canning meat and I’m assuming that covers the rubber seal canners like presto. More info please regarding why. I’ve just began canning meat according to instructions that came with my canner, as well as the ball book. Please, need more info.
Bob Smith · September 28, 2012 at 3:31 am
in reply to your question about metal to metal canners…the term applies to canners such as the All-American pressure canner that have a tapered metal to metal surface where the lid contacts the canner. No ruber gaskets to wear out or replace.
Kellene Bishop · July 15, 2012 at 5:32 am
I’d love to answer your question but I’m having understanding what it is you’re asking me.
Cheryl · July 16, 2012 at 4:44 am
Sorry – my question was not very clear. you posted a reply on 4/2/2012 saying “A steam canner is not appropriate for the canning of meats.”. What is a steam canner? I have a presto brand pressure canner. Would that be considered a steam canner as the water does not cover the jars?
Kellene Bishop · July 16, 2012 at 4:51 am
ah, gotcha. I agree that’s not very clear. A Water bath method is not suitable for canning meats, otherwise referred to as a steam canner cause all it really provides is a bit of steam. A pressure canner though is suitable for canning meats and in spite of my preference, no, the water does not need to cover the jars. You can simply follow the manufacturer direction.
Cheryl · July 16, 2012 at 1:52 pm
Thanks for your response. I knew that water bathing is not suitable for canning meat. Just had never heard the term ” steam canning”. Now I know. Very much enjoy your site. Very informative.
Virginia · August 28, 2012 at 3:44 pm
Kellene, not exactly a canning question –> I love that ridged bakeware you show and I cannot find one anywhere. What is the brand, if you don’t mind sharing? Thanks, Virginia
Kellene Bishop · August 29, 2012 at 1:00 am
I’m not sure why, but it looks like my editor added that picture in spite of all of the other pics in the article. If I had to guess though, I’d say it’s Pampered Chef.
Virginia · September 8, 2012 at 11:31 am
Thanks, I’ll see if I can find it there… Virginia
Shani Chandler · September 20, 2012 at 7:08 pm
Kellene,
I am new to your website, so forgive me if this question has already been asked and answered. Can I fry bacon and then oven can it? My plan would be to fry the bacon first, then place it in sterilized jars and place in oven at 180 degrees for about 20 minutes, then seal with sterilized lids and bands. Would this be a safe way to store cooked bacon pieces?
Kellene Bishop · September 20, 2012 at 8:16 pm
Nope, you’ll need to pressure can it since it’s a protein and fat. Oven canning is really only viable for dried goods and is not a good method for even that in my opinion.
Kellene Bishop · September 28, 2012 at 8:38 pm
Or instead of cooking them for 60 minutes, you can cook them for 15 in a pressure cooker. Yay!
Kellene Bishop · September 28, 2012 at 8:39 pm
AH! Thanks, Bob for seeing the question that I couldn’t see. Now that you answered it, I’m thinking “DUH–why didn’t I understand that that is the question he was asking?” From that standpoint I ONLY use metal to metal canners.
Cindy McKenzie · October 2, 2012 at 12:15 pm
Hi Kellene! I did it! I followed your instructions and I have a supply of beautiful canned bacon. I used 36 lbs. of bacon, 6 rolls of parchment paper and I got 36 jars of bacon. I feel like a proud parent! Thank you thank you! I can’t wait for my Zaycon chicken to arrive! I’m thinking about seasoning the meat in the jar with soy sauce or italian dressing or adding some fresh basil.hmmmm.
Kellene Bishop · October 2, 2012 at 7:29 pm
Does that make me a proud grandma? 🙂
Angela · October 6, 2012 at 5:31 am
Hello!!! Thanks so much for your site… forgive the redundancy, but I’m still confused about my brand new presto pressure canner. You would not suggest using this type for meats? OR, did you simply mean you use the metal-to-metal type. I just want to make sure I have the green light from YOU before I begin! Also.. I’m in Herriman, UT… what time/pressure weight would you suggest for the bacon??
Thanks so, so much!
Kellene Bishop · October 6, 2012 at 6:50 pm
Is it a metal lid against a metal base? If it is, that’s fine, though Presto makes me nervous. The integrity of the metal isn’t as solid as I’d want it to be for repeated use. Check with your instruction manual for canning pork and use that for canning bacon.
Elizabeth Carmody · October 24, 2012 at 3:41 pm
I have canned the usual beef, chicken, and pork cuts and have branched out and am canning hot dogs, bratwurst, ground italian sausage patties, breakfast sausage patties, and meatloaf made from italian sausage. What I have found is that meat regardless of what kindor format (strips, ground, chunks, etc) is canned for my elevation at 75 minutes for pints and 90 minutes for quarts with 11 pounds of pressure. Canning meat to me is not confusing as the guidelines for canning have a measure of continuity. Thank you for providing well balanced directions that we can study and use to determine if we want and feel comfortable about utilizing any particular canned food.
Ed · October 26, 2012 at 1:42 am
Kellene,
I’ve seen this question asked, but in some different ways, water bath and oven. My question is, can you cook the bacon first, and then pressure can it? Would the time be less, as it is already cooked?
Thanks
Kellene Bishop · October 26, 2012 at 3:21 am
You can cook it first but not to crispy. Cook it until just before it starts getting brown and then can it. But if it’s saving cooking time, there’s no need. It will have 75 minutes of pressurized cooking time while you’re canning it. 🙂
Honey · November 24, 2012 at 1:20 am
I have bacon grease that I want to keep long term. I want to use small jelly jars if possible instead of pint jars. Would you can them? Is there any advice about time or pressure or another way to preserve the grease? Thank you. I have canned fruit and vegetables for years but have just started learning about meat.
Kellene Bishop · November 24, 2012 at 2:50 am
Look at the article I wrote called “Rendering and Preserving Lard” You’ll see all the instructions for it.
Lorrie Argabrite · December 5, 2012 at 10:42 pm
Why does the parchment paper need to cover all the bacon? If I accidently didn’t see that part, and when I had some extra room, but ran out of parchement paper, so I stuck some extra slices on the outside of the paper, will that damage the meat? Or is it just a sticking to the jar issue? Also, I understand fully, why you copyright your stuff, and am eagerly awaiting your book…This is a long process, and I want to try it, but if it works, I want to try it again…I wish there were a way, to just charge us a little, to print it out, so we can do it again. Kinda like the songs, if you only like one on the album. ;P Just an idea. 😉 Thanks for all your time! THis must have taken you quite a bit of effort! I’m making a batch for my 90 yr old dad, who is a prepper, for his birthday! Thanks!
Preparedness Pro · September 27, 2013 at 9:57 pm
The parchment paper is so
The parchment paper is so that your bacon doesn’t get cooked sticking to itself. That’s all. It’s not the end of the world. It’s just an aesthetics and functionality thing.
Kellene Bishop · December 6, 2012 at 12:17 am
Your bacon will fall apart and no longer remain in strips without the parchment paper. It will still taste fine, but not be usable as bacon strips. Enjoyment will still be fabulous!
patrice · January 14, 2013 at 3:07 pm
Just found your web site and I love it. We raise our own pigs and our bacon is packaged fresh and then frozen. Can I use the frsh bacon to can even though it is not smoked or cured?
Kellene Bishop · January 14, 2013 at 9:09 pm
So jealous!!!
Yes, you can use the unsmoked or uncured bacon. You may get a different end texture, but if you’re just using it for dishes, casseroles, soups, etc. that won’t be a problem. You can still fry up the strips too, but what I’d suggest is to par-bake them in the oven first for about 10 minutes and then can them so that they hold their shape.
Krissy · February 14, 2013 at 6:35 am
First: I love that I found your site. I am a foody too and can’t live without bacon.
I almost bought a can of bacon tonight and I am so happy that I can do this myself.
Second: I can’t live without butter either…. Help!!! I have canned vegetables, meat a, fruits and dry goods but I know butter can be done and I am clueless!
The third is for your readers. Do yourself a favor and buy the All American canner. It is cast into a solid piece and is the best canner on the market. I researched canners for 3 months before purchasing mine and have canned over 1,000 jars a year with no problems.
I hope you get your book done sooner than later!
Kellene Bishop · February 15, 2013 at 2:28 am
Just put “canning butter” in the search bar on this blog and you’ll find instructions for that.
Patti · February 21, 2013 at 5:33 pm
Hi Kellene, First…. I love, love love your web site and all the detailed info. I am a newbie to pressure canning in as much that I don’t even have a canner yet! Being on a limited budget, yet with health and safety of the utmost importance, I am driven to buy the best quality the 1st time around! Within the next couple of weeks I will be purchasing an All American pressure canner! ( All in due thanks to you! ) Can hardly wait! My main priority right now is canning every type of meat I can! I can’t even begin to tell you how relieved I was to know that bacon can be canned as well… For me it’s NOT “comfort food”, it’s a must have staple! 🙂 Yes I love my bacon, so it is first on my list to can! 🙂 A question I do have is in regards to the parchment paper… I have seen several brands on the market, but are there different “grades/mills or brand” that would be better suited for canning bacon?
Kellene Bishop · February 21, 2013 at 11:41 pm
I just use what the restaurant supply stores have on hand. That way I know I”m getting a good quality and I’m typically getting it for a much better price than the flimsy stuff sold in the grocery stores. I like getting it “pre-cut” in sheets instead of in a roll because the sheets are the perfect width and length for bacon in pint jars. Have at it. I’ve been living “high on the hog” literally this past week on BLTs with the canned bacon and homemade bread. Yum!
Serena · May 14, 2013 at 10:25 pm
I am new”er” to canning. I had a perfect resource and chose not to pay as much attention as I should. I just purchased a new all american pressure canner that I am SOOOOO excited to get using. Im super excited about canning bacon. I saw about Zaycon foods and canning chicken and cant wait until they sell it again!! So, here is my question about canning the bacon. I probably missed it in the instructions or just dont know what Im looking for. How long, after the steam and I put the weight on, do I leave the heat on? Thanks!!
Kellene Bishop · May 15, 2013 at 8:06 pm
your heat has to stay on so that you maintain the pressure throughout the entire pressure canning process.
Serena · May 15, 2013 at 11:17 pm
how long do I can for though? I think I understand everything but that part. Once I have the steam and put the weight on how long do I leave it? I just re-read what I posted and it makes no sense, so please forgive me 🙂
Kellene Bishop · May 16, 2013 at 12:16 am
That is going to be based on your manufacturer’s instruction booklet. Since it’s an All American I believe it would say 90 minutes at 12.5 pounds of pressure or 15 pounds if you in high altitude area.
Serena · May 16, 2013 at 4:56 pm
Thank you!!
lizzy · July 16, 2013 at 4:22 am
kellene…i never ever have heard of canning bacon let alone doing it like this….i will be doing this….thank you…..i do have to buy a new pressure canner …i have one like you have but i don’t trust it to get to the pressure that i need….im on the hunt for a dial gauge so i can see the amount of pressure……
Granny Miller · September 17, 2013 at 8:04 pm
Kelleen –
Kelleen –
Hate to be [edited for graphic language], but what you are recommending is food science untested and potentially a problem.
Just because big industrial food flash cans bacon doesn’t mean it is safe for the home canner.
With all that paper how are you so sure that the core temperature of the jar has reached 240F for the proper amount of processing time for a 100% bacteria kill?
The extra layers of rolled paper surrounding the bacon may act as a cushion and insulate the inner core of the jar from the heat. The fat present in the bacon in theory can insulate the spores of clostridium botulinum and the presence of heat may actually begin to activate dormant spores which will soon be in an anaerobic, moist environment – an airtight stored canning jar – and begin to produce toxin.Hopefully people or are doing this are reheating the bacon to 240F for at least 10 minutes.
There are good food science reasons why canning bacon, butter and milk is never a good idea.
Preparedness Pro · September 27, 2013 at 9:55 pm
Yes, I’ve read it all and
Yes, I’ve read it all and heard it all before. I’m completely comfortable with my methods.
Folks who advocate NOT canning such items are obviously unfamiliar with the DECADES of experience and methods that generations before us utilized–and with much less reliable technology and equipment.
I believe that due to the rampant possibilities of food borne illnesses, EVERY can food should be sufficiently heated. However, the 240 degrees that you suggest is woefully excessive since an internal temperature of 85 degrees for 5 minutes is all that’s necessary to sufficiently kill the clostridium botulinum. (you can look that up on any CDC site.)
Did you know that the CDC discourages people eating baked potatoes in foil too and yet all kinds of restaurants safely use this practice.
IF I was canning all of this is the backwoods or in a barn, I would perhaps give more merit to your scenario, but there are a bundle of redundant safety measures taken during the canning process with today’s process, including working in a clean kitchen, with clean hands. And by the way, the bacteria you refer to originates in the soil. There’s NO soil or contact with soil when I’m working in my kitchen. It’s kept top notch clean as everyone’s should.
Diana Ballard · December 1, 2013 at 10:13 pm
Somewhere I saw a post on
Somewhere I saw a post on canning bacon that has been chopped into about 1″ pieces. That’s how I want to can mine instead of the strips with the parchment paper. BUT I have no idea where I saw that recipe or even how it was done. Have you ever canned it like that or could you help me out? THANKS BUNCHES!!
Preparedness Pro · December 2, 2013 at 8:56 pm
you could certaninly dry can
you could certaninly dry can your bacon that way if you’d l want
nancy@little homestead in boise · July 10, 2014 at 8:14 pm
Do you have any articles on
Do you have any articles on pressure canning on a flat top stove? I’ve read that’s a no no, and I have a glass topped range. I’d love to do it! Thanks!!
Preparedness Pro · July 10, 2014 at 9:02 pm
The issue doesn’t merit an
The issue doesn’t merit an entire article. The early generation flat top stoves were inconsistent in their heat distribution and some of them were also made so poorly that the heat brought on by the pressure canner would cause the stove top to crack. However, today’s flat top stoves are typically capable of handling it. I’ve used nothing but a flat top stove for my pressure cooking and pressure canning for the past 15 years and never had a problem. I discuss this in this YouTube video: https://www.youtube.com/watch?v=V4MDfhrN9Sw&list=UUAaj2kthyvHCMgkm6PD_gcA
Comments are closed.