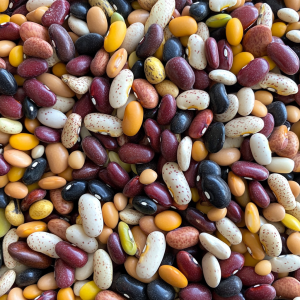
Dried beans have a 25-30 years shelf life when stored properly
So you found an old bag of beans lurking in the back of your pantry, and you’re ready to give them new life. You toss them in a pot, hoping they’ll turn out tender and creamy, but they stay as tough as tiny pebbles, no matter how long you simmer them. Don’t throw in the towel (or the beans) just yet! With a few smart tricks—including a pinch of baking soda and maybe even a pressure cooker—you can make those ancient beans as good as new. Here’s the full scoop on reviving old beans and making them delicious.
Why Do Old Beans Get So Tough?
As beans age, their structure changes. The outer shell becomes harder, and the starches inside dry out, which makes them more resistant to water and slower to cook. If they’re really old, they might seem like they’re impossible to soften, but don’t worry—there’s hope.
The Secret Ingredient: Baking Soda
The most effective trick for cooking old beans is adding a bit of baking soda to the soaking or cooking water. Here’s why baking soda works so well:
- It raises the pH of the water, making it more alkaline, which helps break down the beans’ tough pectin (a structural component in the cell walls). This lets water penetrate the beans and makes them soften faster.
- Baking soda also helps if you have hard water, which contains minerals that can prevent beans from absorbing water as easily. Baking soda removes these minerals, allowing the beans to hydrate better.
Some critics say that baking soda can give beans a “soapy” taste, but this only happens if you overdo it. Used in the right amount—a small pinch per cup of beans—baking soda makes the flavors of the beans pop, bringing out their natural taste without any soapy side effects.
Step-by-Step Guide to Cooking Old Beans
Step 1: Sort, Rinse, and Prep
Start by sorting through your beans to remove any small stones or debris. Rinse them under cold water to wash away any dust and get them ready for soaking.

ham and beans
Step 2: Soak with Baking Soda
Soaking is especially helpful for older beans, and baking soda takes it up a notch. Here’s how to do it:
- Add baking soda: For every cup of beans, add ¼ teaspoon of baking soda to the soaking water. This small amount is enough to help soften the beans without affecting the flavor.
- Soak for 12-24 hours: Give the beans a good long soak at room temperature—at least 12 hours, or up to 24 hours if they’re really tough. Think of it as giving them a full spa treatment.
- Rinse thoroughly: After soaking, drain and rinse the beans well to remove any residual baking soda and prevent unwanted flavors.
Step 3: Use Fresh Water for Cooking
Place your soaked beans in a large pot and cover them with fresh water. Don’t reuse the soaking water, as it can carry some of the baking soda residue. Fresh water will ensure that the beans cook evenly and taste clean.
Step 4: Add a Little More Baking Soda in the Pot
To make sure your beans soften fully, add another ¼ teaspoon of baking soda to the cooking water. This extra boost will help break down the tough fibers during cooking.
Step 5: Low and Slow Cooking on the Stovetop
Bring the pot to a gentle simmer over medium heat. Avoid boiling, as high heat can cause the beans to split or cook unevenly. Low and slow is the way to go here. Depending on their age, beans can take anywhere from 1 to 3 hours to become tender. Just be patient—you’ll get there!
Step 6: Test for Tenderness
After about an hour, start testing the beans for doneness. Take one out, let it cool a bit, and give it a taste. If it’s still too firm, keep simmering, checking every 30 minutes until they’re just right. Your patience will pay off with perfectly tender beans.
Shortcut Option: Using a Pressure Cooker
If you have an Instant Pot or pressure cooker, it can make quick work of even the oldest beans. Here’s how to get the best results:
- Add Baking Soda: Older beans still benefit from a little baking soda in the pressure cooker. Add ¼ teaspoon per cup of beans to help soften them.
- Use Plenty of Water: Beans expand as they cook, so add at least 3 cups of water per cup of beans to avoid drying out.
- Start with a Shorter Cooking Time: For unsoaked old beans, set the pressure cooker to 25-30 minutes on high and then let the pressure release naturally. Check for doneness and, if necessary, cook for another 5-10 minutes. You can always add time, but overcooked beans are hard to salvage.
- Add a Splash of Oil: Beans can foam up while cooking in a pressure cooker. Adding a tablespoon of oil to the water can help reduce foaming and prevent clogging the valve.
The pressure cooker can make old beans tender in as little as 30-40 minutes, and the high pressure breaks down the tough outer layer evenly. This is a great option if you’re short on time or just prefer a hands-off approach.
Flavor Tips to Elevate Your Beans
Once your beans are nearing perfection, it’s time to add some flavor. Here’s how to make sure they’re anything but boring:
- Add aromatics like onions, garlic, or fresh herbs (bay leaves, thyme, rosemary) to infuse your beans with subtle, savory flavors.
- Hold off on salt and acidic ingredients (like tomatoes or vinegar) until the beans are mostly cooked. Salt and acid can slow down the cooking process, so wait until they’re soft before adding these.
- For a smoky kick, toss in a smoked ham hock or some chopped bacon once the beans start to soften. It’ll add richness and depth that’s perfect for soups, stews, or a bowl of beans as a main dish.
Common Questions About Cooking Old Beans with Baking Soda
Can I use baking soda with fresh beans?
Not necessary! Fresh beans usually cook up fine on their own. Baking soda is really for older beans that need a little help.
Will baking soda change the flavor of the beans?
If you use it sparingly (¼ teaspoon per cup of beans), it shouldn’t affect the flavor. It actually helps bring out the beans’ natural taste, making them taste fresher. Just don’t go overboard.
What about hard water?
Baking soda is especially helpful if you have hard water, as it neutralizes the minerals that make beans tough. So if hard water is an issue for you, baking soda is a must.

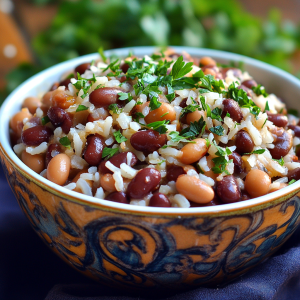
Beans and rice form the perfect protein
How do I store cooked beans?
Once your beans are tender, allow them to cool completely, then transfer them to an airtight container with a bit of the cooking liquid to keep them moist. Store in the fridge for up to a week or freeze for longer storage. Of course, there’s always the canning option so that when a crisis comes, you don’t have to spend so much time getting a meal on the table, or water for that matter.
Final Thoughts: Don’t Give Up on Old Beans
A bag of old beans might look like a lost cause, but with a little baking soda, patience, and perhaps a pressure cooker, you can turn them into a delicious, tender meal. So the next time you dig up a dusty bag of beans, don’t toss them—revive them! Armed with these tips, you can transform even the oldest beans into something tasty, hearty, and satisfying.
With this guide, you’ll have tender, flavorful beans ready for soups, stews, salads, and more in no time. It’s time to let those beans shine!


