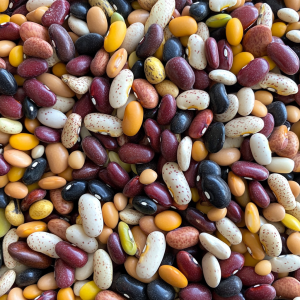
Dried beans have a 25-30 years shelf life when stored properly
When it comes to emergency preparedness, every item in your stockpile should earn its keep. Bean flour, while not as glamorous as some survival gear, offers practical benefits that make it a worthy addition to any prepper’s pantry. Let’s explore the real, down-to-earth uses of this versatile ingredient.
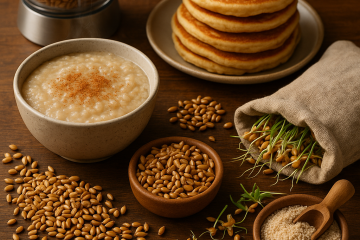
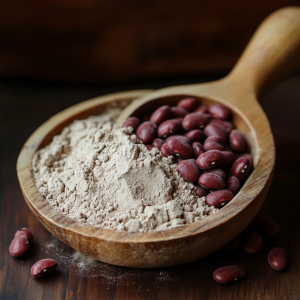
First and foremost, bean flour shines in its primary role: as a food source. In a crisis where traditional supplies might be limited, bean flour provides a compact form of nutrition. It’s rich in protein and fiber, offering a good nutritional profile when fresh produce is scarce. Unlike whole beans, it doesn’t require long soaking and cooking times, which can be crucial when conserving fuel and water.
One of the key advantages of bean flour is its shelf life. When stored properly in airtight containers in a cool, dry place, bean flour can last up to 1-2 years. While not as long-lasting as whole dried beans, it offers a good balance between convenience and longevity. (Always rotate your stock.)
Best Practices for Storing Beans
When it comes to storing beans for long-term preparedness, several factors come into play to ensure maximum shelf life and nutritional value. First and foremost, choosing the right container is crucial. Food-grade buckets, #10 cans, or Mylar bags with oxygen absorbers are all excellent options, but whatever you choose, make sure it’s airtight to ward off moisture and pests. Speaking of moisture, it’s a bean’s worst enemy in storage. Ideally, your beans should have less than 10% moisture content for long-term storage, and adding desiccant packets can help absorb any residual moisture.
Temperature and light also play significant roles in bean storage. A cool, dark place is best, with an ideal temperature range between 50°F and 70°F (10°C to 21°C). Keep in mind that for every 18°F (10°C) increase in temperature, you could be halving your beans’ storage life. UV light can degrade nutrients over time, so using opaque containers or storing in a dark place is advisable. To further extend shelf life, consider using oxygen absorbers in your storage containers. This not only prevents oxidation but also deters insect activity.
While properly stored beans can last an impressive 10-30 years, it’s still important to rotate your stock using the “first in, first out” method. This ensures you’re always using the oldest beans first and replenishing with fresh stock. When comparing whole beans to bean flour storage, it’s worth noting that whole beans have a longer shelf life. Bean flour, being more processed, is more susceptible to rancidity due to its higher surface area. As a result, you might consider storing mostly whole beans and grinding them into flour as needed, if you have the means to do so in an emergency.
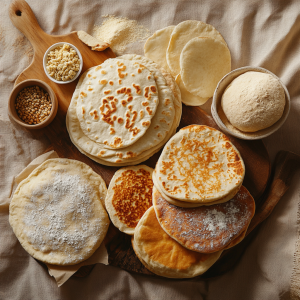
All kinds of bread products can be made from bean flour
For quick reference, expect whole dried beans to last 10-30 years under optimal storage conditions. Store-bought bean flour, when sealed, can last 1-2 years, the same as your home-ground bean flour if you store it properly. By understanding and implementing these storage principles, you can ensure your bean supply—whether whole or flour—remains a reliable resource in your prepper pantry.
In the kitchen, bean flour’s versatility becomes apparent. It can be used to thicken soups and stews, adding body and protein to stretch meals further. For those with gluten sensitivities, bean flour can be a valuable alternative in baking when wheat flour is unavailable. It can be used to make flatbreads, pancakes (see recipe below), or as part of a gluten-free flour mix for other baked goods.
Bean flour also serves as an excellent binder. In lean times, it can help hold together veggie patties or meat loaves, making limited resources go further. This binding property also makes it useful in creating homemade energy bars, protein powder (see recipe below), combining it with nuts, dried fruits, and sweeteners for compact, nutritious food on the go.
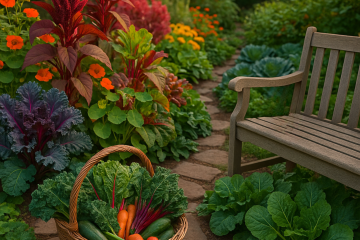
For those focusing on self-sufficiency, bean flour represents a way to process and preserve part of a bean harvest. If you’re growing beans as part of your preparedness strategy, turning some into flour can diversify your food storage options.
It’s important to note that while bean flour has many uses, it’s not a miracle product. (No, I can’t believe I’m having to say this.) Claims about using it for non-food purposes like caulking or pest control are unfounded and potentially problematic. Using bean flour as a sealant could indeed attract rodents and other pests, creating more problems than it solves.
When incorporating bean flour into your preps, consider these practical tips:
- Store in small, airtight containers to maintain freshness and allow for easier rotation.
- Learn and practice cooking with bean flour before an emergency situation arises.
- Include a variety of bean flours (like chickpea, black bean, or lentil) for nutritional diversity and different flavors.
- Remember that bean flour, like many legumes, can cause digestive discomfort if you’re not used to it. Introduce it gradually into your diet.
Bean flour is a prepper’s staple
Bean flour earns its place in a prepper’s pantry through its genuine nutritional value, versatility in cooking, and relatively long shelf life. It’s not a multi-tool or a miracle solution, but rather a practical, nutritious ingredient that can help sustain you in challenging times. By focusing on its real benefits and uses, you can make informed decisions about how bean flour fits into your overall preparedness strategy. Enjoy the recipes I have for you!
Basic Bean Flour Protein Powder Recipe
Ingredients:
- 2 cups bean flour (chickpea, soy, or a mix of different bean flours)
- 1/2 cup powdered milk (adds calcium and helps with texture)
- 2 tablespoons cocoa powder (optional, for flavor)
- 1-2 tablespoons sweetener of choice (sugar, stevia, or monk fruit powder)
- 1/4 teaspoon salt
Instructions:
- Combine all ingredients in a large bowl.
- Mix thoroughly, ensuring even distribution of all components.
- Store in an airtight container in a cool, dry place.
To use: Mix 2-3 tablespoons of the powder with water, milk alternative, or add to smoothies.
Tips and Variations:
- Nutrient boost: Add 1-2 tablespoons of ground flaxseed or chia seeds for omega-3 fatty acids.
- Flavor options: Experiment with vanilla powder, cinnamon, or other shelf-stable spices.
- Texture: For a smoother powder, sift the mixture through a fine-mesh strainer.
- Storage: In an airtight container, this mixture can last 6-12 months, depending on the freshness of ingredients used.
Bean Flour Pancake Recipe for Preppers
Here’s a simple recipe for bean flour pancakes that you can make with basic prepper pantry ingredients:
Ingredients:
- 1 cup bean flour (chickpea flour works well, but any bean flour will do)
- 1 cup water
- 2 tablespoons oil (vegetable, coconut, or any shelf-stable oil)
- 1/2 teaspoon salt
- 1 teaspoon baking powder (optional, but helps with texture)
- Sweetener to taste (honey, sugar, or any sweetener you’ve stored)
Instructions:
- In a bowl, mix the bean flour, salt, and baking powder (if using).
- Add water and oil. Mix until you have a smooth batter. If it’s too thick, add a little more water.
- If desired, add sweetener to taste. This can be adjusted based on personal preference and available supplies.
- Heat a pan or griddle over medium heat. If possible, lightly grease it.
- Pour about 1/4 cup of batter for each pancake.
- Cook until bubbles form on the surface and the edges start to look dry (about 2-3 minutes).
- Flip and cook the other side for another 1-2 minutes until golden brown.
Notes:
- These pancakes will have a denser texture than wheat flour pancakes.
- They’re quite filling due to the high protein content of bean flour.
- You can add other pantry items like dried fruit, nuts, or seeds for variety.
- If the batter seems too thick after sitting, add a little more water before cooking.